


Who said that it is impossible to make a quality repair with your own hands? You can, but you have to work hard. Decided to plaster the ceiling? Do you think that you have enough strength? Then read carefully.
Before proceeding with the plastering of the ceiling slab, one must stock up with all the necessary materials and tools, as well as carefully study the process technology.
Tools and materials
For work, we need:
- deep penetration primer;
- gypsum plaster;
- plaster rail (beacon 6 mm);
- construction mixer or drill with a special nozzle;
- sickle (stucco mesh) with a sticky side;
- wide plaster grid (optional);
- narrow spatula (for applying mortar);
- wide spatula (for leveling plaster);
- master OK;
- rule
- horizontal level;
- bath for painting;
- roller with extension;
- plastic bucket;
- protective glasses;
- respirator;
- gloves
- headdress.
Primer surface
Ceiling primer is an important part of the job. It is needed for reliable adhesion of the plaster to the ceiling. It is best to use a deep penetration primer, as it provides the highest adhesion strength of the finishing layer to the concrete base. The plus is that many types of this primer contain additives that prevent the growth of fungus.

Before proceeding directly to the primer, the ceiling should be cleaned of the old coating, if any (paint, whitewash, loose plaster, etc.). If the work promises to be dusty, it is advisable to use special glasses and a respirator. They will protect the nose, mouth and eyes from the ingress of construction waste. They clean the ceiling with a spatula, water and a rag. To remove paint, it is better to use a special metal brush.
After cleaning, the ceiling is washed and left to dry, and a wet cleaning of the room is also carried out. This is necessary so that dust does not settle on the primed ceiling.
After preparatory work, we proceed to the primer.
- We protect all already finished surfaces, reliably covering them with a film.
- We put on gloves and a hat.
- Pour the primer into the prepared paint tray.
- Dip the roller in the primer, get rid of excess moisture with the ribbed part of the bath and coat the ceiling in one direction, leaving no gaps.
- We wait until the ceiling dries.
- We do the same, applying a primer perpendicular to the previous layer.
- My tools.
If you suddenly primed a floor or walls, wash them immediately with warm water. Otherwise, a stain will remain, from which it will be impossible to get rid of.
Beacon Installation

Beacons are installed to level the surface of the ceiling in a horizontal plane. Before installing them, check the level for any sudden changes on the surface of the plate. In this case, you risk using up too much plaster.
Before installing the beacons, we prepare the surface of the ceiling. If there are seams on the plate, glue a sickle to them.
- Using the horizontal level, determine the upper and lower points of the ceiling, apply marks.
- According to the marks we pull the lace on the walls.
- Draw parallel lines on the ceiling with a pencil. The first line runs 30 cm from the wall. The second is at a distance slightly shorter than the length of the rule. Using this technology, we make markings for the required number of beacons.

The best material for the ceiling is gypsum plaster. Lighthouses are installed precisely with its help.
- We put on gloves.
- At intervals of 30 cm, apply small layers of plaster to the lighthouse mount.
- We fix the lighthouse. On gypsum plaster it will hold perfectly.
- Using the level and orientation on the lace, align the lighthouse by applying plaster and cutting off the remains with the rule.
- We install the remaining plaster racks. We make sure that all lighthouses are in the same horizontal plane.
- We wait until the plaster dries and firmly fixes the beacons in itself. You have to wait about an hour.
Ceiling Plaster Instructions

Getting to the application of plaster. First, prepare a solution.
- Pour water into a plastic bucket at the rate of 18 liters per 30 kg of dry mix.
- Pour 6-8 trowels of dry plaster into the water and mix.
- Pour the remaining contents of the package into a bucket and mix thoroughly using a construction mixer or a drill with a special nozzle.
- We end up with a homogeneous mixture, let it brew for 5 minutes, and then mix again.
The solution is ready. Nothing more can be added to it, otherwise it will deteriorate.

Getting to the application of plaster:
- Using a small spatula, apply the plaster mixture evenly to a small area of \u200b\u200bthe ceiling.
- We carry out the rule on the lighthouses, removing excess plaster.
- We repeat the procedure in the next section, plastering the entire ceiling in this way.
- After the hardening of the plaster layer, we fill the solution with the remaining shells on the ceiling, removing excess mixture with a wide spatula. We wait until the plaster dries.
- We repeat the same procedure, applying a layer of plaster perpendicular to the previous one. Leave the ceiling to dry.
After drying, see if stucco particles remain on the ceiling. If left, take a spatula at an angle of 45 degrees and cut them off.

We decide whether we will fasten the plaster mesh to the entire ceiling. If there are places on the ceiling where the layer thickness exceeds 30 mm, it is recommended to install the mesh. It is done like this:
- Apply a thin layer of plaster to the ceiling (it is desirable that the solution is more liquid than when applying the main layer);
- We fix the grid on the solution, leveling it with a wide spatula and making sure that the edges of the two grids go to the joint;
- We do this all over the ceiling and leave it to dry;
- Using a wide spatula, we apply the penultimate thin layer of liquid plaster, filling in possible irregularities and removing excess;
- We repeat the same procedure, applying the finish layer perpendicular to the previous one;
- After drying with a spatula, we remove the remaining excess of the plaster, holding it at an angle of 45 degrees.
The ceiling is ready for further decoration.
If it is decided to use painting or wallpapering as the ceiling finish, then you can level the surface in two ways - to plaster the ceiling or to hem it with drywall. The second option is not always suitable, because due to the installation of the supporting frame, the ceiling surface drops by 5 cm minimum. If you need to maintain the height of the room, then it is better to choose plastering. We will tell you how to plaster the ceiling with your own hands for painting.
When do you need to plaster the ceiling?
Sometimes, instead of plastering, putty is used to level the base. But how to understand which alignment method is suitable in each case? To begin with, it is worth saying that the putty from the plaster differs in the granularity of the mixture. Putty has a fine-grained structure, and plaster is a coarse-grained solution. In this regard, the putty mixture must be applied in a thinner layer and used to eliminate minor defects of the base.
Large holes and cracks, as well as irregularities with differences up to 5 cm, can only be cleaned with plaster mortar. In this case, the plastering of the ceiling for painting is an intermediate step in the preparation and leveling of the base. Plastering can be called rough leveling, after which the puttying and priming of the base necessarily follow.
On a note! Alignment of ceilings for painting can be done with plaster or putty mixture. The choice of solution depends on the evenness of the base and existing defects.
Plastering technology
In order for the quality of the painted surface to fully satisfy you, you need to prepare and level the base well. For this, it is important to precisely follow the technology of the work. We will tell you how to plaster the ceiling with your own hands for painting. If you have at least some skills in performing such work, then you can do without involving craftsmen. In this case, you will be able to save significantly, because the price of professional plastering is rather high: manual plastering costs $ 10.5 / m², machine plastering will cost a little cheaper - $ 7.8 / m².
Tools and materials

Before plastering the ceiling for painting, prepare everything you need for work:
- stepladder;
- dry plaster;
- protective clothing;
- putty;
- set of spatulas;
- primer;
- rule
- trowels;
- construction mixer or drill with a nozzle;
- brushes and rollers for applying a primer;
- primer tray;
- a container for mixing a mixture of 20 liters;
- sandpaper or paint net.
Selection of plaster mix and primer
First you need to pick up a primer for plastering the ceiling. For these purposes, the following formulations are suitable:
- For all types of plastering and puttying, universal primers are suitable.
- Special compounds for plastering are needed when preparing the base, as well as before finishing puttying.
- Immediately before painting the ceiling, soil is used under water-based paints.
Advice! It is much more profitable to buy one universal primer, which can be used at each stage of work.

To choose a suitable stucco mixture, you should adhere to such rules:
- For plastering the ceiling in rooms with high humidity (bathroom, toilet, pool) use solutions based on cement or a mixture of lime and cement. Such compositions are used for outdoor work, in particular for plastering building facades.
- For rooms with normal humidity, it is recommended to use plaster compositions based on a mixture of lime with gypsum or only lime.
- If you plan to work on a wooden or stone base in a room with minimal humidity, then you can buy clay plaster.
Primer surface
Now let's talk about how to plaster the ceiling with your own hands for painting. First, the base must be treated with a primer. This will provide better adhesion of the solution to the base surface. Before that, the old finish is completely cleaned from the ceiling. Cleansing is carried out up to the base. It is important to clean the ceiling well so that there are not even small particles of the finish or old glue. The remaining particles will cause poor adhesion of the plaster to the base and its subsequent detachment.
After removing the finish, the ceiling is cleaned of dust. To do this, use a rag, brush or vacuum cleaner. Stains from rust, mold or grease must be removed. For this, antiseptics, special solvents, blowtorches and gas burners are suitable.
After thorough cleaning, the ceiling surface is treated with a primer. We use a deep penetration primer, which we apply with a brush or roller. It is recommended that the ceiling be primed in two layers, each of which must dry separately.
Beacon Installation
It was the turn to tell how to level the ceiling for painting. To do this, install ceiling beacons. The level of surface and the result of work depend on how evenly they are exposed.

We set the beacons like this:
- Using a laser level and a paint cord on the walls of the room, we draw a level of a clean ceiling. Beat off from the lowest angle in the room.
- The first lighthouse is installed at the lowest point on the ceiling surface. Perforated profiles can be used as beacons. We fix the beacon element on the base surface using plaster or putty.
- After that, from each installed lighthouse, we put marks on each side with a step of 30 cm. Based on this marking, we set the following profiles similarly.
- Using the level we check the horizontal installation of all beacons.
Important! Since the plaster can be applied in a layer with a height of not more than 50 mm, all beacons can be installed from the base surface at a distance of no more than 5 cm.
Plastering
Before plastering the ceiling for painting, you need to prepare a solution.
We carry out the work in the following sequence:
- in containers with a capacity of at least 20 l pour pure cold water;
- then gradually pour the dry mixture to prepare the plaster;
- the solution is mixed well with a drill with a mixer nozzle or in a construction mixer;
- after preparation, the solution is allowed to stand for 10 minutes and mix well again (the mixture should be uniform in consistency).
On a note! The proportion of water and dry mix is \u200b\u200bindicated by the manufacturer on the package. It is recommended to adhere to the specified ratio.

Work on plastering the ceiling is carried out in the following sequence:
- Using a trowel or trowel, we collect the solution and sprinkle or spread it on the ceiling surface. Each master himself chooses a more convenient way for applying plaster mass to the ceiling.
- The solution fills the space between two beacons to a width of 60 cm. After that, the surface is leveled by the rule, resting its two ends on the lighthouse rails.
- In the same way, the remaining sections between the beacons are filled and leveled.
- If you need to perform the second layer, then the first should completely set. The setting time depends on the composition of the plaster. So, gypsum mixtures set in 25 minutes, cement hardens longer - up to two hours. One can guess about the drying of the lime mortar by the color of the surface (it should turn white).
- Now you need to carefully remove the lighthouse profiles. It is impossible to leave them in the plaster layer, because the linear expansion of the steel element and the mortar are different. In addition, the steel profile may rust, causing stains to appear on the ceiling. We fill the notches from the profiles with a solution, and we smooth the ceiling well with a spatula. Particularly carefully align the joints of the wall surface and ceiling and the internal corners.
- After complete drying, sand the surface with sandpaper.
If you want to clearly understand how the plastering of the ceiling for painting is carried out, a video of the process will help you with this.
Finish leveling
If plastering and painting the ceiling is carried out, finishing alignment is mandatory at the final stage. If you paint on the plastered surface, then due to the granularity of the base, the coating will be inhomogeneous and ugly. As a result of finishing puttying and priming of the surface, it is possible to achieve perfect smoothness of the base.
Before puttying, the ceiling is covered with two layers of deep penetration soil. The first coat should dry before applying the second. After the last layer dries, we proceed to puttying the ceiling. To do this, use a finished or dry finishing putty (we dilute the dry mixture with water in the specified proportion). After the surface dries, we grind it with sandpaper or a paint net. The base should be perfectly smooth and even, without chips, protrusions and cracks. After this, the ceiling is primed again. When the solution dries, you can begin to stain.
To achieve a perfect result, you need to know the subtleties that are known only to professional masters. Below are the tips of specialists who will help in the work.

It is more convenient to clean minor irregularities on the ceiling surface with ready-made plaster mortars. Although their price is higher than that of dry mixes, due to the small consumption, you can save effort and money. When working with lime solutions, it is necessary to protect the eyes and skin of the hands well, because lime is very corrosive.
To ensure better adhesion of the stucco mortar to the base, treat it with Concrete Contact primer. In the case when a layer of plaster is required to be made with a thickness of more than 50 mm, a reinforcing mesh is used.
- Ceiling plastering
- Grout plaster surface
In order to describe as clearly as possible how to plaster the ceiling with your own hands, let us take a small room as an example. For this we need the following materials:
- laser or water level;
- rule
- lighthouses;
- gypsum plaster;
- screws with dowels;
- gypsum plaster.
Tools for applying plaster.
Before you start plastering, you need to carefully mark and prime the surface.
Marking the surface of the ceiling and its primer
First you need to correctly mark the ceiling.
Beacons on the ceiling should be placed in the direction of incidence of light from the window.
This is necessary so that if an error occurs during the installation of beacons (most often the middle beacon is installed in violation), then it would not be so noticeable. It is necessary to take into account such subtleties, because when placing beacons across the room, the light falling from the window will reveal such an error.

The layout of the room with lighthouses.
Beacons are installed depending on the width of the room. Up to three meters - two rows of lighthouses are placed, each row is installed at a distance of about 60 cm from the walls. The process of plastering the ceilings with their own hands takes place in the following sequence: first the middle strip is plastered, then two side ones. In rooms with a width of 3 to 5 m, lighthouses are placed in three rows. If the width of the room is more than 5 m, then there can be four rows, etc.
As an example, we took a room with a width of 3.5 m, so we need to install three lighthouse rows. We install two rows near the walls, departing from them by about 20 cm, and put the last one along the center of the room, thus as if dividing it in two. In this case, you can begin the process of plastering in the direction from the center of the room to its wall. In this case, the length of the rule allows you to do this. The first lighthouse in each row should be about 2.5 m, slightly less than the length of the rule for plaster. The size of the second can be any.
Then it should be noted in which places the screws will be screwed in, they are needed for the correct marking of the height difference in the room. On the ceiling, for your convenience, you can immediately write where which beacon will be located so as not to re-measure them again. After the marks for the self-tapping screws are applied, using the puncher we make holes in the places of the marks and determine the dowels in these holes.

The sequence of applying primer layers on the ceiling: 1 - the first layer; 2-second layer; 3 - the direction of the rays of light from the window.
Before you start screwing screws, you need to process the entire ceiling with a primer. There are a lot of primers for plastering work in construction stores, so choose it in accordance with the surface that you are going to plaster. If the surface is smooth, then a stronger primer, such as concrete contact, is needed. When processing the surface, it is not worth it to regret the primer. After you have completely processed the entire area of \u200b\u200bthe ceiling, you need to let it dry.
When the primer is dry, you will need to find the lowest point in the room. To find this point, you can use the laser level, if you do not have it, then a simple, water level will do. To measure the water level, you need to attach it to the rule and measure, starting from the corner of the room, while noting the height level of each section near each hole for self-tapping screws. The purpose of these measurements is to find the lowest point at which the thinnest layer of plaster will be. If you make a mistake during the measurement, then there may be an overrun of the plaster, the layer will come out very thick. Or at the end of the work you can rest against the plane of the ceiling, on which even the thinnest layer of plaster cannot be applied.

Methods of applying decorative plaster to the ceiling.
When the lowest place near the drilled holes is found, we screw in a self-tapping screw so that it peeks out about 5-7 mm. This thickness has a stucco beacon. Since the self-tapping screw was screwed into the lowest place of our ceiling, other self-tapping screws will look a little more. We take the second self-tapping screw and screw it in approximately at the same level with the first. We check the horizontal between them by means of the rule, we check the second self-tapping screw with respect to the first by the water level.
Depending on what the level shows, we screw or unscrew the self-tapping screw, while not forgetting to check each action with a level. In the same way, we adjust the following screws, be sure to check the level between them. To mark up using a water level, you will have to spend about 2 hours of your time. With the laser, everything is much simpler, the whole process will take about 20 minutes.
Back to the table of contents
Ceiling plastering
The Rotband plaster has such features: you can not apply more than 1.5 cm of plaster, while the second layer can not be applied either. Such rules exist in European countries. Everything is much more prosaic here, most often a second layer is applied up to 5 cm thick.
The principle of plastering the ceiling is the same as that of wall plaster, that is, apply plaster to the ceiling and remove excess. You can apply the solution with a different tool, depending on the thickness of the layer. If the layer thickness is less than 1.5 cm, then it is better to use a steel smoothing device.

The scheme of applying plaster with a crusher.
It is necessary to impose a small amount of solution on it and gently spread it on the ceiling with light movements with pressure. If your layer is more than 1.5 cm, then it is better to work with a spatula. When you knead a solution, you need to remember that too thick a solution will be poorly applied to the ceiling and fall off under its own weight. Therefore, the solution must be made not quite thick so that it sticks better to the surface.
If the thickness of the solution is large, so-called bubbles may appear. These are places where the solution did not adhere to the surface of the ceiling, under its own weight, it sagged, and thus an air bubble formed. Most often, such bubbles appear in the corners. To avoid this, you must first apply a thin layer of plaster, and then apply the main one. The point is that the solution adheres very well to the solution and no voids form.
The second layer must be applied before the first one dries, so that the gluing of the layers occurs better. If you applied the second layer after the first has dried, then cracks may form on the surface of the plaster, and you will have to remove the entire layer so that in the future it does not fall. And with bubbles even easier, you need to wait until the solution dries and use a spatula to remove the place of its formation to the very base. And then, in a new way, put plaster on this place.
The process of plastering is best done with your back to the window, so the light will not interfere with you. Removing excess solution occurs by moving the rule or trowel toward you. The final movement, on the contrary, is done on its own, so the light from the window will allow you to see the gaps between the stucco and the rule and quickly respond to possible problems.
After applying the plaster to the main places on the surface, there may be places along the walls on which the plaster has not yet been applied, also remember to unscrew the screws. They can prevent you from leveling the solution with the rule, and after grouting they can be seen even under a layer of putty. The holes from them and the places along the walls are closed after the plaster dries. After that, we remove all the beacons and close up the formed furrows.
The ceiling is striking - this is a fact. Not always, of course, in the first place, but it rushes. When it is executed as evenly as possible, the room looks neat and presentable - even if you do not purposefully look up. Let's talk about how to plaster the ceiling - after all, this is one of the most important stages in creating beauty and comfort in the house. Proper execution of work will allow you to forget about repairing surfaces above your head for more than one year.
For the best adhesion of the solution to the base, it is necessary to properly prepare the surface. First of all - to "remove" the old coating to the concrete. The base - the "bare" concrete ceiling - after all the manipulations should remain completely clean.
Flush or not flush?
Do not "think" to wash off whitewash or putty! Thus, you will only carry white hard-to-remove dirt on the surface. Subsequently, a primer of the “concrete contact” type will hold on it either very poorly, or not at all.
"Flushing" can be called a logical solution for the ceiling only if you plan only a slight redecoration - its simple "trimming" and updating; without thick layers of finishing materials. Otherwise, the plaster will have nothing left but to soak and pull off the rest of the putty. Moving away from the base, the plaster will “cobble”.
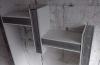
Type of ceiling prepared for plastering
The primer will provide adhesion
After thorough cleaning of the ceiling, you can proceed to priming. The primer of the “concrete contact” type has special grains in its composition, which form a surface roughness when dried - thanks to this, the plaster adheres to the surface much better. We leave the primed ceiling alone until the next day - the entire area should thoroughly dry.
Try not to overdo it with opening windows and drafts - the whole process should proceed as naturally as possible.
Ceiling beacons
Algorithm of actions:
- Use a hammer drill to drill holes in the ceiling. They should be centered and along the edges of the ceiling. Self-tapping screws will be screwed in according to the level of the rule - the distance between the holes will depend on its length;
- Drill the first hole, retreating from the wall about 30 cm, each subsequent one at a distance slightly less than the length of the rule;
When using a two-meter device in the "standard" room, no more than three holes will be required - at the opposite walls and in the center.
- Hammer the dowel into each of the holes and tighten the screws, check each position using the level;
The check should be carried out not only along the length and width, but also along the diagonal;
- The next item is the formation of paths between the beacons (from the solution).
Attention! For the tracks, use the same plaster that will subsequently plaster the ceiling.
- The path should hide the caps of the screws;
- Take the perforated strip of the lighthouse profile and attach to the track. Using, again, the rule, push it into the solution until it stops with self-tapping screws, repeat the procedure with all the elements;
- Carefully coat the resulting beacons with a solution, especially carefully fill the voids along the rail;
- Now you can arrange a short break for yourself - it is necessary for the "setting" of the solution.
Important! According to some sources, all work after the installation of beacons should be stopped for 24 hours or more - in order to achieve absolute polymerization of the stucco mortar. This step is really justified - the risk of displacement and / or damage to the beacons is reduced. But on the other hand, the joints of fresh and hardened putties will be doomed to insufficient adhesion. This will adversely affect the strength of the entire ceiling area. The most reasonable solution in this situation is to plaster on relatively fresh lighthouses, while being as careful as possible.

Plastered ceiling in the kitchen
Stucco ceiling in steps
It all depends on the thickness of the plaster layer. If this is 10-15 mm, then you can do without a grid, limiting it only to gluing in places of seams between the plates (rust).
If the thickness of the plaster exceeds 20-25 mm, it is better not to rely on the "random".
Mixture preparation
Experts unanimously declare that gypsum mixture is the most rational option for solving such a difficult task as plastering the ceiling with your own hands. Consider the solution preparation algorithm using the example of a Knauf gypsum Rotband mix:
- A plastic container must be filled with 18 clean water;
- Using a spatula, “attach” 1 kg of the dry mixture to water, mix thoroughly;
- Add the remaining mixture;
- Knead the solution with a drill with a nozzle;
- Ensure product uniformity;
- Leave the product for 5 minutes, then mix again.

How to plaster the ceiling - the finish line
Apply the solution with a metal spatula or a grater previously moistened with water: the plaster will not stick to the tools. The layer thickness should slightly exceed the distance “beacons - the base of the ceiling”. Press the grater firmly to the ceiling so that there are no sinks or voids. So, the first layer is applied.
Now take a roll of mesh, unwind it a little and place it over your head. Using a grater or a spatula, press the mesh to the applied layer; at the same time, continue to unwind (along the beacons) the roll. Note! Using galvanized metal mesh for reinforcement, make significant efforts - “push” the composition through the cells.
After fixing the mesh, apply a second coat. Remove excess plaster as a rule (drag it along the beacons). The final stage is the removal of the beacon plates (aluminum can be left without touching). Seal the furrows with the remaining solution. Subsequent finishing work should begin after the plaster has completely dried (3-14 days).
How to plaster the ceiling - video
The video instruction will help you assess your strengths and decide whether to plaster the ceiling with your own hands.
Accuracy and strict adherence to instructions is an absolute guarantee of success. It is worth noting that plastering the ceiling is not an easy task. If you still have doubts about your own competence, do not risk it: contact experienced specialists.
How is plastering the ceiling done by yourself? How and how to plaster the ceiling? Is it even worthwhile to level the ceiling with plaster or is it better to prefer suspended or suspended ceiling structures?
Let's try to figure it out.
Pros and cons
Let's start with the main thing. Is it worth it to plaster the ceiling?
Advantages
- In terms of material costs, this is the least expensive method to tidy the ceiling. The cost of building mixtures is much lower than the cost of a cassette or stretch ceiling.
- , usually, environmentally friendly. Neither cement nor gypsum mixtures emit anything harmful to the environment.
- Plaster the ceiling is also advantageous in that will not reduce the height of the room. The maximum thickness of its layer is 5 centimeters.
Please note: in fairness, both stretch and false ceilings can also reduce the height of the room very slightly. It all depends on the materials you choose.

The minimum distance between the stretch ceiling and the ceiling is only 4 centimeters. Profile Width
disadvantages
- If plastering the ceiling with your own hands is a fairly budgetary way to put the ceiling in order, then foreign services in this area will cost a fairly significant amount. For example, a home-made suspended ceiling made of PVC panels will cost much cheaper.
- Level differences that plaster of ceilings and walls can hide are limited to five centimeters. The restriction is associated not only with the prohibitively high consumption of building materials. The fall of thick stucco from the ceiling poses a very real threat to life and health.
- Finally, for plaster, certain skills are still desirable. If most of the suspended structures can be assembled by a beginner with an acceptable result, then, taking the plaster of a large room for the first time, you can hardly make the ceiling surface perfectly even. And for painting, it is the ideal surface that is desirable.

How to plaster
So, we plaster the ceiling again. Where to begin?
Battlefield Inspection
First you need to decide: do we need exactly plaster?
- If the size of the bumps does not exceed five millimeters, it makes no sense to start a laborious operation. It is enough to putty the ceiling using a wide spatula and a rule.
- It has already been said about the maximum layer of plaster: if the height differences exceed five centimeters, plaster becomes an absolutely inexpedient venture. If you are a beginner, it is better to completely limit yourself to a layer of no more than three centimeters.

Surface preparation
Take the worst-case scenario for us: the old stucco is partially destroyed and affected by the fungus; the ceiling has deep cracks at the seams and height differences.
How to prepare the surface in this case?
- Moisten ceiling over the entire area with water. At least two times with an interval of a couple of hours. Water will make it much easier to separate the old plaster, in addition, there will be immeasurably less dust.
- Armed with a trowel, clean out ceiling surface to floor slabs. In problem areas, a hammer may also come in handy. In the joints between the boards, remove all loose stucco.
- Residues of lime and cement dust rinse off a simple wet sponge.
- Then comes the turn of the antiseptic primer (fungus, remember?). Process she is affected by mold areas with an overlap of at least 20 centimeters. If the room is damp - it is better to process the entire ceiling.

Please note: to kill mold, you can use any liquid containing chlorine (domestic White or its analogues). However, the antiseptic primer will not only destroy the fungus, but also prevent its reappearance. It’s better not to save on trifles.
- Finally, last but not least, the ceiling is primed with any primer. A penetrating primer will strengthen the outer layer of concrete and improve its adhesion to the plaster.

Plaster selection
Plastering of walls and ceilings can take place using cement-lime mixtures or more modern gypsum. Professionals strongly recommend staying on the second option.
Causes?
- Gypsum plaster tolerates shrinkage at home within reasonable limits. Cement-lime, under the same conditions, gives cracks.
- The adhesion (adhesion) of gypsum plaster to the concrete surface is much better. As a result, putty can be not only sprayed like cement-lime, but also spread. To a beginner, such a method would seem immeasurably easier.

Knauf Rothband gypsum plaster is an excellent solution at a very reasonable price. No wonder it is so popular among builders.
Lighthouses
The easiest way to level out significant swings is lighthouse plaster.
How it's done?
- Using the laser or water level is the bottom point of the draft ceiling.
- Then, 10 millimeters below this point, the stucco level is beaten off and the lighthouse profiles are attached. The simplest way to fix them evenly is to pull the strings driven into the horizon line of the carnation, then stick several blotches of finished plaster on the ceiling in a line and, guided by the threads, press the profile into the putty. Then you can move on to the next.
- The step between the profiles is 20 centimeters smaller than the length of your rule. A short rule is more convenient to work with; however, a long one will allow you to put the beacons on and give a more even surface.

- The plaster is spread on the ceiling with a trowel of medium width so that it protrudes beyond the lighthouses, and remove the excess as a rule. In this case, the rule moves in a zigzag, and not in a straight line.
- The correct technology for ceiling plastering is to apply a layer no thicker than 2 centimeters at a time. If there are more bumps, let the first layer dry and then apply the second one.
Important: when applying plaster in two layers after applying the first between two beacons, the ceiling is reinforced with a synthetic mesh. The strips are pressed into fresh plaster with an overlap of about ten centimeters. Further decoration of the ceiling with plaster is also carried out after the first layer has dried.

Fine finish
Finally, the surface of the ceiling is leveled using (in the case of using gypsum plaster, you can immediately apply the final putty).
Tool - wide spatula. It is easiest for a beginner to follow a simple algorithm: with the interval necessary for drying, the putty is applied with two extremely thin layers, then the ceiling is sanded.

To grind the ceiling, you can use a hand grater with a sanding mesh. However, with a large ceiling area, the work will be extremely tiring. A grinding machine will save you a lot of time. A respirator or gauze dressing and goggles are mandatory at this stage.
Useful little things
Toward the close - a small selection of scattered useful information.
Perhaps it is this part of the article that will lead you to the fresh idea of \u200b\u200bdecorating your home.
- Venetian plaster relatively rarely used on the ceiling: this is the material that can often be seen on the walls. Initially, its components were marble chips and beeswax. Now, as a rule, acrylic resin acts as a binder.
The solution is beautiful; however, do not use this type of plaster, imitating the texture of polished stone, in bathrooms and toilets. Flooding from above will cause the coating to peel off; choosing the exact same color for repair is simply unrealistic. Will have to re-plaster the ceiling.

- Textured plaster on the ceiling - the solution is rather ambiguous and definitely not intended for the kitchen. The reason is dust. Removing it from bumps will not be easy. The best such plaster for the ceiling is on a polymer basis. It is less afraid of humidity and more resistant to abrasion when washing compared to silicate (based on water glass) and mineral (based on cement and lime).
By the way, choosing different tools and different methods of final processing (roller, spatula or grater), you can get completely different surface structures with one plaster.
- Ceiling plaster repair usually involves the removal of crumbling formations and the repair of cracks. Old stucco is tapped to reveal exfoliated formations and cavities beneath them. All weak points are cleaned to concrete. Cracks expand with a knife or spatula. Then the defect is primed and primed.
- After the putty is finished, before painting the ceiling, do not be too lazy to primer it again. The operation will not only make the surface more durable and improve adhesion to the paint. It will also reduce paint consumption when applying the first coat.
Do not doubt the economic side of the issue: with comparable quality, the primer is always much cheaper than water based paint.

You will also be interested in:
Tsugunov Anton ValerievichTour time: 5 minutes The modern design of the premises is often not ...
Do you want to make a bath in the house? Be prepared to meet serious requirements and ...

The easiest way to update the exterior walls of the house and give them uniqueness is ...

Trimming gooseberries is not a whim of perfectionist gardeners, but the most important procedure, from ...
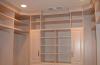
If you have empty niches in your home, you can fill them with built-in wardrobes ....

