


Sooner or later, any person somehow faces the repair of the toilet. You can entrust this work to professionals, but you can save money and do it yourself. In this article, we will analyze in detail what work is ahead and in what sequence it is better to carry it out.
Any enterprise begins with a comparison of desire and opportunity. If finances allow, then the boundaries of desires are very arbitrary. We will talk about a decent repair of the toilet with our own hands with a minimum budget. This is the foundation for further narration.
The planning of the process itself has a clear sequence:
- Full cleaning of the room;
- Replacing plumbing communications and wiring;
- Preparation of surfaces for finishing work;
- Finish:
- Paul
- Sten;
- The ceiling.
- Plumbing installation.
Zero point should be set to "Design development and procurement of materials." But this can create confusion. Therefore, describing each stage, we will justify the advantage of certain materials. The cost of all the decoration elements, for objectivity, we took from YandexMarket.
Room cleaning
Full repair, declares absolute cleaning of the room. Nothing but the pipes of the common riser should remain in it.
The sequence must also be observed. First, tile the walls off. Depending on the quality of the connection, this can be done with a puncher in the “hammering” mode or with a simple ax, using it as a spatula. Along the exposed walls pass a drill with a brush nozzle.

Explanation: it is quite possible to lay a new tile on an old covering. But in this case, it will take 3-5 cm from the height of the room.
Only after this, whitewash is washed off the ceiling. At the same time, dust is washed off the walls and floor.
Plumbing is dismantled at the very least. To do this, shut off the water supply in, unscrew the mount and remove the toilet drain from the sewer pipe. If the toilet is very old, then it will have to be broken out, since the drain was sealed with cement mortar. The entrance to the sewer pipe is cleaned of pieces of sanitary ware and cement.
Before the end of work, put a plastic bag on the hole and tie it with a rope.
Explanation: Dismantling the toilet allows you to create a solid floor covering, without painstaking trimming and fitting tiles. In addition, later the toilet can be easily replaced.
Replacing communications and wiring
Self-replacement of a water riser, in practice, is never carried out. The reason is the need to shut off the water supply in the entire riser, and this is the prerogative of the plumbers from the service organization. But a more important factor is time and guarantees.
Do-it-yourself replacement of riser pipes without professional skills will require leaving residents without water for the whole day. It is unlikely that your neighbors will tolerate it. Specialists will cope with this task much faster.
The quality of the work done has a deeper implication. If the replacement of the riser is carried out by specialists from the Housing Office, according to an official application, then in the event of leaks or any emergency, the responsibility will rest with the installers. Otherwise, you will have to pay for the repair of flooded apartments.
But you have the right to choose the material for the riser within your apartment. The most affordable and high-quality material is polypropylene pipes reinforced with fiberglass. They are suitable for both hot and cold water.
The wiring in the apartment can be done independently. The best material for this purpose is corrugated stainless steel. At a price it is more expensive than or polypropylene pipes, but then you get:
- Savings on the corners;
- Aesthetic appearance;
- Almost unlimited service life;
- Extremely easy installation.

The cost of 1 meter of corrugated stainless steel pipe ø 16 mm - 92 p. An important condition for long-term service is the use of brass fittings.
The electrical wiring will require modernization in case you want to install several lamps in a miniature toilet. And this happens extremely rarely.
A very successful solution would be the installation of a tubular energy-saving lamp above the entrance, parallel to the doorway. In this situation, you can not touch the wiring.
Surface preparation for finishing
According to the results of this paragraph, all surfaces should be smooth and even. The easiest way to deal with the floor. For leveling, you will need to use a quick-drying, self-leveling screed. For 1m 2, with a thickness of 1 cm, 13-14 kg of dry mix will be required. For the toilet, 1 bag is enough, weighing 25 kg and costing 400 r.
Pre-primed floors. We recommend immediately priming the walls and ceiling. The mixture is diluted according to the instructions on the packaging and poured. To avoid making the layer too thick, disperse it a little with a spatula. The complete hardening process takes 24 hours.
Aligning the walls in the toilet is a conditional task. The fact is that in such a small area, littered walls are extremely rare. Therefore, if the walls of the toilet are concrete, then a primer is sufficient, and if the plastered brick, then putty will be required.

For putty necessary:
- Work spatula 30 cm long;
- Auxiliary spatula 5 cm long;
- Putty mixture 20 kg (Weber: Vetonit 310 r);
- Drill with nozzle and capacity.
Setting time for cement-based putty ≈ 90-120 min. Dilute 2-3 kg of the dry mixture, following the instructions on the packaging. Then using a short spatula, apply a small amount of mortar to the long blade. When applying the working tool at an angle of 20-30˚, spread the mixture on the wall from the bottom up. Apply new servings of the mixture successively.
By adjusting the angle between the wall and the trowel, you can get different effects. With an acute angle, cracks and depressions are filled, with an angle close to a straight line, the applied composition is aligned.
Excess material creeping toward the edges of the tool is collected with a short spatula, and again applied to the long blade.
Do not strive to achieve a perfectly smooth surface in one pass. After processing all the walls and waiting 3-4 hours, you can walk around the problem areas again.

Pay particular attention to corners. They are not allowed influxes and fillets. It is not necessary to achieve geometric accuracy in all angles, they will be covered with finishing materials, but the surplus should be removed.
After a day, the walls can be treated with an emery cloth to get a high-quality coating for further work.
The final chord of this stage is the primer on the prepared walls and floor.
There is almost always a slab on the ceiling, so preparation is not required other than priming.
Finishing work
Floors
The specificity of the room limits the choice of flooring. Of all the options, only bulk floors and tile are suitable for the toilet.
Bulk floors look attractive, but they have two huge drawbacks:
- High price;
- A very complicated process.

If you use them, it is better in a place where they are noticeable. In the toilet, they will be hidden. So, there remains one option - tile.
Given that the toilet has been dismantled and the base has been prepared, laying tiles in the toilet with your own hands is an extremely easy process. The choice of tiles, the question is very sensitive. We do not have the right to advise on the color and pattern, but we will help you figure out the dimensions.
The size of the standard toilet in the apartment is 0.8 by 1.2 m. For convenience, try to find a tile that fits into these dimensions without waste, for example 40 x 30 or 40 x 40. In this case, you will need to glue only 8 or 6 elements . Note that the smaller the number of elements in the mosaic, the easier the work is done. And for the price such a choice would be quite acceptable. For example, the manufacturer CERROL, in the Nero (Black) series, 1 m 2 of 40x40 tiles will cost 1304 rubles. Enough for the toilet and almost no waste.
There is another option for light finishing the floor in the toilet - mosaic tiles. These are ceramic tiles 2 x 2 cm in size, glued to the substrate. Having picked up the size of the sheet, you can cover the entire area in 2-3 doses. But this option, subsequently, will not prove to be the best.
The fact is that small elements of the floor covering visually reduce the dimensions of the toilet.
Tile glue "Eunice 2000" in 5 kg packaging will help to cope with the task "excellently". Its price is 130 rubles. Consumption ≈ 4-5 kg \u200b\u200b/ m 2.

Still need:
- Notched trowel;
- Crosses;
- Laser level;
- The square.
Thickness of crosses no more than 1-2 mm. In a small room, large seams will not look aesthetically pleasing.
The method of laying tile is direct. The toilet is too small a room for a beautiful pattern.
Progress:
Dissolve glue following the instructions on the package. If you, following our advice, chose a large tile, then knead the whole bag. While the mixture swells (4-5 minutes), set the laser level so that a horizontal beam is projected at a height of 15-20 cm from the floor. TIP: It is most convenient to put it on a horizontal sewer pipe. At all laser levels, the head is self-leveling, so even if there is a slight tilt, the beam will still show the true horizon.

The floors are sweeping. Apply the finished glue with a notched trowel to the tile. Please note: the glue should be smeared over the entire surface. This will not only increase the adhesion area, but also allow you to drill holes for fixing the toilet in the future without fear of breaking the tile. The thickness of the adhesive, should not exceed the thickness of the tile! Put the tile in its place. Sticking is best to start from the wall opposite to the entrance. Stir the glued element with an amplitude of 2-3 mm.
Consistently applying a square to each corner of the tile, compare the level at which the laser beam is projected. If necessary, trim the tile.
Similarly, glue the second tile, align it and then insert the crosses. There should be 2 crosses on each side of the tile.
With proper planning, it will be necessary to trim the tile only once to bypass the pipes of the riser. To do this, it is best to use a grinder with a cutting disc. ATTENTION: the disc must be specialized, without radial cuts.
Measure the distance you need to cut with a tape measure. Most likely, it will be an angular sector. Set aside the dimensions on the front of the tile.
Tip: stick masking tape on the tile, it is more convenient to mark it.
Lay the tile on a flat surface and fix it. When working with a grinder, be sure to use glasses!
It is necessary to cut through, so under the tile should be soft material (a wooden bar or two pieces of gypsum plaster).

The trimmed edge can be processed with sandpaper.
If gaps of 1-2 cm remain, then evenly distribute them so that they fall between the tile and the wall. Subsequently, they will be closed with wall decoration materials.
According to the above scheme, all floor tiles are glued. After a day, you can walk on it and at this time begin to grout the seams. The optimal material for filling the tile slots is silicone sealant. It is easy to work with, after drying it gives an elastic seam with impeccable hygienic characteristics.
To work, you only need white silicone sealant in the tube and a lint-free cloth.

Cut the nozzle off the tube so that the thickness of the escaping silicone is minimal. Insert the container with sealant into the gun, and with even pressure, draw along one of the seams. Excess silicone protruding outward with a slightly damp cloth. Slots should be flush-filled.
Silicone should wind up within 3-5 hours. Then cardboard should be laid on the floor, and you can begin to finish the walls.
Walls
Wall decoration is possible with two materials: ceramic tiles or wall panels. We do not consider painting and whitewashing in principle, while other materials have low moisture resistance.
Tile is a traditional option for the toilet. It looks presentable, serves a very long time. But there are points on which it is inferior to plastic panels. In particular, :
- Cheaper
- Sticking easier, faster, do not require professional skills;
- Models with a 3D effect look gorgeous;
- You can easily change and “refresh” the appearance;

There is another nuance that can affect your choice. In the toilet, it will be necessary to close the water riser. If you use wall panels, then it will be possible without special labor and preliminary preparation to close with them this unsightly need.
In addition to everything, you can improve the appearance if you select wall panels with a width of 40 cm, just the size of the tile. All finishes will take on the appearance of a finished composition.
To fix the wall panels, “Liquid Nails” are required. We recommend the use of “Moment Installation”.
To work, you will need:
- Wall;
- Liquid nails with a gun;
- Hacksaw for metal;
- Construction knife;
- Roulette and marker.
The panels begin to be glued from the place where they are placed entirely, without cutting in width. Measure the height and set aside the required size on the panel. Sawing off excess with a hacksaw for metal, make sure that the lamella does not bend or break at the very end of the cut.

The glue is applied in continuous strips, along the entire length, the diameter of the outgoing roller is 4-5 mm. Between each strip of glue there should be a distance of 5-7 cm. Immediately attach the panel to its place, and slightly move it from side to side to smear the glue. But then remove this panel, and give an exposure of 3-4 minutes. This is required for the adhesive to interact with atmospheric oxygen.
After exposure, the panel is glued. To control the vertical position of each bar, use a plumb line. Squeeze the lamella for 30-40 seconds and stir a little
All panels are fixed in a similar way. But to bypass the water riser, proceed as follows.
Explanation: Between the front and back of each bar, there are stiffeners. If you cut the back of the panel along the entire length along these edges, then it can be bent and pasted over the rounded sections.
In the place where the riser is located, on the back of the panel, the back sheet is cut along with the stiffening ribs. Additionally, the lower part is cut, where the drain of the sewer pipe exits. To make the outlet of the water pipes neat, they are unscrewed from the stopcock on the riser. And on the panel, a hole is made to the size of the tap itself. A similar operation can be carried out only if you work with wide panels!

A horizontally lying sewer pipe can be glued with scraps of wall panels, leaving a hole for connecting the toilet.
This option of wall decoration in the toilet, will avoid the use of end strips. After all, the edges near the entrance will be closed by a door clerk.
Instead of the baseboard, glue the slat. In appearance, it is the same, only narrow.
Ceiling
To decorate the ceiling of the toilet, when the walls and floor are already decorated, you should proceed as the final chord, which will complete the whole composition. If there is a large dark tile on the floor and dark panels on the walls, then the ceiling should be white and gold.
There are two options, it is a rack ceiling or ceiling PVC panels. In appearance of the finished coating, they will practically not differ. But the rack ceiling "steals" from a height of at least 7 cm, due to the mounting system. And its installation will take an order of magnitude more time.
With PVC ceiling panels, the whole process will take 40-50 minutes.
Given that they will look the same, a sane person will choose PVC ceiling panels.
On the example of two-section strips with gold, produced by Olympia, we will describe the installation process. The width of the lamellas is 24 cm, the length is 3 m. The price of one bar is 180 r. The ceiling in the toilet requires 2 panels.
Glue them on the same “Installation Moment”. The lamellas are adjusted in length and glued, starting from the entrance, according to the technology described above.

Around the box covering the riser, the panels are trimmed with a construction knife.
Plumbing Installation
Plumbing installation consists of two stages:
- Installation of a toilet bowl with a tank;
- Connection to the system.
The option with a hanging toilet is not even considered. Its miniature, just a marketing ploy to increase sales and create another group of products. After all, the mounting system and the tank of the hanging toilet will require you to allocate at least 20 cm to it from behind. In other words, the size of the toilet will in fact become 0.8 x 1 m.
Therefore, we will install a regular toilet. To fix it, you will need to drill 2 or 4 holes in the floor. In this case, first you need to drill tile. This can be done with a diamond-coated tubular drill by switching the puncher to the “drilling” mode.
After passing the tile, put the punch into the "chiselling" mode, and put the drill.
The dowels are hammered into the holes with a mallet and the toilet is fixed through plastic washers.
TIP: Apply silicone sealant to the base of the toilet. After pressing to the floor, excess silicone will be squeezed out, they must be removed immediately. But then such a seal will not allow water to penetrate under the toilet itself, during wet cleaning.
To connect the toilet drain hole with the entrance to the sewer pipe, a corrugated adapter is used.
The hoses for supplying water to the tank, in modern models, have a rubber sealing gasket and do not need to be wound. In addition, plastic ears are integrated into the head of the hoses, they allow you to do without an adjustable wrench.
Tsugunov Anton Valerevich
5 minutes to read
Usually, little attention is paid to toilet repair and a minimum budget is allocated. But despite the fact that this is the smallest room in the apartment, it can and should be made beautiful and comfortable. If you are at a loss with the choice of material, you don’t need to rack your brains: the best solution, although not the easiest one to implement, is with tiled decoration. Photos, videos, instructions and useful tips will help you determine the design and go through all the stages of work if you want to repair this room yourself.
The choice of interior elements and design thinking
To get started, decide what plumbing will be in your toilet. During the repair, you can combine the bathroom with the toilet or, conversely, separate them. Usually only a toilet is installed in a separate toilet or a sink is added.
There are many types of toilets in appearance and material. When choosing it is worth focusing on your own taste and budget.
What else can be placed in this room:
- bin;
- necessary accessories - a holder for toilet paper, a brush, etc.
- cabinet for detergents;
- sink and towel holder.
All elements can be selected in accordance with the general design concept, creating an original and finished interior.
Usually a separate toilet is the smallest room in an apartment. Its area can be 2–2.5 square meters. m. It would seem that such a modest space does not require design sophistication. But with the right choice of materials, you can visually expand the room and raise the ceilings.
When planning a repair, you need to decide on the following points:
- the need to align the walls, floor and ceiling;
- selection of materials for decoration;
- thinking through lighting;
- the choice of plumbing.
The toilet is the most important part of the room, the sequence of all repairs depends on it. If you want to change it, you need to choose a new product before decorating the walls and ceiling.
Style for the repair of the bathroom
- Palace style. Baroque and Rococo suggest the use of gilded details, rich finishes, elaborate lamps and many decorative elements.
- High tech. This style is characterized by the use of the most modern materials, minimalism in decoration, the predominance of black and white colors.
- Japanese. This style involves minimalism in all details, the use of simple forms. Walls can be decorated with sakura tiles.
There are many design options for the bathroom and toilet. You can follow certain directions or combine several styles. Your imagination should not be limited to anything, including materials.
Material selection
The main requirement for all materials is hygiene. The toilet should always be clean, and it is advisable that the cleaning does not take much time. That is why tiles are most often used for wall and floor decoration. It is easy to clean, not exposed to moisture and looks aesthetically pleasing.
There are several types of tiles for the toilet:
- Glazed tiles are the most popular type of wall decoration. There are many design options for tiles for every taste and budget.
- Plain ceramic tiles. It is thicker than tile and has a rough surface. Therefore, such tiles are most often laid on the floor in rooms with high humidity.
- China. This is a glossy tile, durable, less porous than ceramic, which perfectly tolerates humidity, is resistant to scratches and wear.
- Majolica is an incredibly beautiful expensive Italian tile with a raised surface.
- Porcelain tile - is strong, steady against any influences, unpretentious leaving. It can be matte, polished, satin, glazed, textured, provides ample design opportunities.
Repair in the toilet can be done using other materials:
- wallpaper;
- plastic panels;
- paint.
But all of the listed types of finishes lose to the tile in terms of hygiene and moisture resistance. In addition, variations in colors, patterns and texture of tiles exceed the design capabilities of other materials.
When choosing a color, remember that a small toilet will visually expand the light tile.
DIY tile laying
After the toilet installation is installed in the toilet, if necessary, you can proceed to the decoration of the walls, floor and ceiling. Follow the instructions, and then the repair will not take much time.
How to make a repair:
- The preparatory phase includes the removal of the old coating from the walls, ceiling and floor. All dirt and construction debris are removed from the toilet.
- At the first stage, it is necessary to make a box of drywall for pipes to close them, but at the same time provide access to them if necessary. Metal guides are attached to the floor and ceiling, moisture-proof drywall is screwed to them with screws.
- First you need to lay the tile on the floor. It is poured with a screed, and after it is dried, floor material is laid.

When it comes time to make repairs in the toilet, in most cases it is necessary to replace not only the design of the room and sanitary ware, but also make a complete or partial replacement of water and sewer pipes. The article will discuss how to do a major overhaul of the toilet with your own hands.
Tools needed to repair the toilet
To carry out the preparatory work and the repair itself, you will need:
- to dismantle accessories in the toilet or to collect the frame for upholstery screwdriver, it is desirable that it be attached bit set;
- if you need to remove the old tiles, you need to cook hammer drill. In the Repair Process, it will also be required for drilling holes in concrete or brick walls;
- gas key. It is useful for unscrewing and securing screw connections of the toilet bowl, sink or pipes;

- for applying a waterproofing layer or primer, it will be required brush or roller;
- serrated and ordinary spatula for applying tile glue;
- welding device and special scissors for plastic pipes;
- roulette;
- building level.It is good if it is available small, up to 60 cm long and long. This will make the work more convenient;
- during operation, tools such as a chisel, hammer, hacksaw, etc. may also be required.
Dismantling old plumbing
- If the repair of the toilet with your own hands is planned to be overhaul, then the work begins with the removal of the old plumbing (toilet, sink and bath, if the bathroom is combined).

- Regardless of whether work is being carried out in an apartment of a multi-storey building or in a private house, first of all, it is necessary to completely shut off cold and hot water. After that, the sink and toilet bowl are cleaned. The second is desirable to remove the last and at the end of the day to install back, so that you can use it.
- After making sure that the water does not flow through the pipes (just open all the taps), all the water is drained from the drain tank. If this is not done, it will leak to the floor.
- Most often, sinks in the toilet are mounted on brackets that are attached to the wall. But sometimes they are made with decorative pedestals covering pipes and drains. In this case, you must first dismantle it by unscrewing the fasteners from the floor. Then a basin is placed under the sink and a siphon is unscrewed, as a rule, a certain amount of water is poured out of it. It is recommended to tightly plug the resulting hole in the sewer pipe with a rag. This will protect against unpleasant odors in the room.
- Using a gas key, unscrew the water supply hoses, through which water flows to the sink. And only now you can remove the sink itself with a mixer.
- Dismantling the toilet begins by disconnecting it from the hose that supplies water to the tank. Then, depending on the installation, it is unscrewed from the base or removed from the brackets.
- Clean the pipe, which leads directly to the sewer. Even if the toilet is reinstalled, it is better to throw this element away and purchase a new one.
- The toilet is unscrewed from the floor. If it was installed only on self-tapping screws and sealant, then it is enough to swing it slightly, after which it can easily separate from the floor and you can remove it. Often, in old houses, the toilets were mounted on concrete mortar, here you can’t do without buying a new one, since you won’t be able to carefully remove it.

Preparing toilet walls and floors for repairs
A number of modern finishing materials designed to repair the toilet and bathroom involves the use of lathing, and therefore, at first glance, there is no need to remove old coatings. But during the service they could absorb unpleasant odors and mold appear in the cracks. If the lining is planned with a material that is fixed with glue, then a high-quality preparation of the base is simply necessary.
- Ceramic tiles it is convenient to remove the puncher with a special nozzle. Either knock down with a hammer and a chisel, but this is a very lengthy process.

- Painted wallspre-heats with a building hairdryer until the paint begins to bubble, after which it is scraped off with a spatula. Or, without heating, they are cleaned with a grinder with an iron brush.
- To remove plasters it should be well moistened with spray water. When it gets wet enough, it is cleaned with a spatula.
- Wallpaper removed similarly to plaster. But you can wet them not just with water, but with a special compound that is sold in any hardware store. After soaking it, the old wallpaper easily leaves the wall.
Having finished with the walls, proceed to clean the floor.
- Floor tiles it is removed in the same way as from the walls, using a puncher or a chisel. Then the surface is cleaned with a grinder from small pieces, achieving absolute smoothness.
- If the concrete floor is very old and crumbled, then it is advisable to remove the top layer and refill.
- To eliminate small irregularities, there is no need to make a full concrete screed, it is enough to make a thin layer of the bulk floor.
At the end of dismantling, all dust is cleaned with a construction vacuum cleaner.
Primer and waterproofing in the toilet
- For rooms such as a toilet or bathroom, it is recommended to use a deep penetration antiseptic primer. It will not only improve the adhesion of tile adhesive to the surface, but also protect the walls from the formation of mold and fungus.
- Apply it in 2 layers, with complete drying of the previous one.
- Even if the toilet is not combined with the bath, it is necessary to make high-quality waterproofing of the floor. This is due to the fact that sewage and water pipes pass in the room, and in case of an emergency, flooding cannot be avoided.

- For the floor in the toilet, it is most convenient to use liquid waterproofing, which is applied with a brush. It also needs to be done in 2-3 layers with an entrance to the walls of 10-15 cm. The most vulnerable places are the joints of the floor and walls, in these places it is advisable to lay a special tape on the still not frozen waterproofing composition.
- When the waterproofing of the floor is finished and completely dry, they begin to change the pipes.
Replacing pipes when repairing a toilet
Metal pipes have long been replaced by plastic and metal-plastic analogues. Therefore, if old pipes are installed in the house, they must be replaced at the repair stage. So that in case of an accident it is not necessary to urgently dismantle the new cladding to repair or replace the water supply.
- In order to completely replace them, it is necessary to dismantle all the pipes up to the place where the wiring is done for a particular apartment. It is not always easy to do it yourself, it is better to call plumbing.
- In the future, work will not be difficult, you just need to replace the old pipes with new ones in a similar way. It is more difficult if it is planned to introduce new devices, such as boilers or stationary cleaning modules.
- Plastic pipes are easily cut with special scissors. Fittings are used for their fastening with each other, the inner diameter of which is equal to the inner diameter of the pipes. First, the pipe is cut to the desired size, after which one end is inserted into a special soldering iron and immediately a fitting is strung onto the other end of this soldering iron. He melts them from the inside, after which they must be pulled together very quickly and connected to each other.

- After piping, their fittings remain open, to prevent the ingress of building dirt into them, plugs are temporarily put on all outlets.
- Modern pipes are gray or white (the second option is almost twice as expensive). They look quite aesthetically pleasing, but nevertheless, it is recommended to make a decorative box for them, which in the future can serve as a convenient stand.
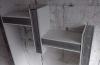
Installation of the pipe box in the toilet
- The box is a frame with a lining of moisture-proof drywall.
- For the frame, wooden slats 2 cm thick or a metal profile are suitable. They are cut to size and immediately attached to the floor and walls. Even small items must be checked by level.
- For plumbing (for a sink or a washing machine), such a box is located on the bottom of the wall. For sewers make vertical in the corner of the room or directly behind the toilet.
Repair of small toilets photo

- Each box must have a special window, which in case of an accident will provide access to important system nodes. It is convenient when instead of lining with drywall and further cladding with tiles, it is sewn directly onto the frame with plastic panels. In this case, it can be quickly and easily completely disassembled.
- Moisture-resistant drywall or plywood is suitable for covering the frame of the box. They are fixed with screws. When cutting, the edges must be even, so that corner joints form in the correct form.
- If it will be tiled, then it is enough to simply process the finished box with a primer. If you plan to apply plaster, paint or wallpaper, then you need to putty the entire surface, while reinforcing each joint of the material with a sickle.
Facing materials for toilet
Despite the fact that the humidity in the toilet is much lower than in the bathroom or in the combined bathroom, it’s still customary to choose moisture-resistant finishing materials for its decoration. This is mainly due to the fact that the walls over time absorb unpleasant odors and should be able to periodically wash them. This is especially true for small toilets, as in modern private houses these rooms have a large area and are often supplemented by a window. The most popular types of finishing materials for repairing a toilet in a typical Khrushchev:
- PVC panels;
- washable paint;
- ceramic tile;
- washable wallpaper.
Plastic (PVC) panels

Plastic panels for the toilet is an economical and quick option to finish the toilet. Until recently, their main drawback was a low aesthetic appeal, but today the choice of such materials is very wide. Modern panels not only imitate the pattern of materials, but also repeat the relief and structure. High-quality printing of the applied drawing allows you to achieve truly beautiful interiors.
Advantages:
- panels are produced in lengths from 2.5 to 3 m. This is enough to choose the right size for the height of the ceiling in the toilet;
- universality lies in the possibility of their fastening, both on the walls and on the ceiling. But in the latter case, narrower models are offered, often having mirror inserts;
- they are easily mounted with a minimum set of tools. Do not require long surface preparation and roughing. After fastening, almost no debris remains in the toilet;
- the presence of the crate allows you to hide all the wiring and make additional noise insulation or insulation. What is especially important when repairing the combined bathroom in which the washing machine is located.

Steps for installing plastic panels on the walls
- First of all, the toilet wall area is measured minus the doorway. Also take into account the right amount of material for cladding boxes, if any.
- In addition to the panels themselves, you will need to buy additional elements (connecting profiles, corners, skirting boards, etc.).
- On the prepared walls, make a crate of horizontally placed battens or a metal profile. The more often they are placed, the more rigid the facing structure will turn out. At the same stage, if necessary, mortgages are made of boards or metal in those places where the wall cabinets, mirrors, etc. will be attached.
- Often apartments in old houses sin with uneven walls and ceilings, so it is recommended to measure the length of each panel. The excess is cut off with a construction knife or grinder. The first panel is mounted starting from the corner. Fix it on small self-tapping screws with a press washer so that the panel attaches firmly, but it does not warp due to too deep twisting.
- The next panel is simply inserted into the already attached one. Thanks to the fastening of the groove / spike, it turns out to achieve a seamless effect, of course, if the drawing allows you to do this.

- At the very end of the work, the corners are closed with special plastic extensions, and the joints of the walls with the floor and ceiling are skirted.
Ceiling repair in the toilet with plastic panels
- To fasten pvc panels to the ceiling, it will be necessary to create a fundamentally different frame than for walls. It is necessary to create a suspension structure.
- Metal perforated hangers are attached to the ceiling with a pitch of 50 cm along the ceiling. To them, in turn, light bars of 2x2 cm in size are attached.
- Or, a profile is screwed along the perimeter of the toilet with a spacing of 3-5 cm from the ceiling and longitudinal guides are already attached to it.
- All communications are located in the obtained subceiling space, they make wiring for future lighting and ventilation.
- The installation of the panels themselves is no different, they also begin to be mounted from one of the edges, inserting each subsequent one using the provided connection.
- When they reach the place where the lighting device will be located, the hole for the wire is carefully cut with a sharp knife. In diameter, it should be slightly smaller than the decorative overlay of the lamp.

Ceramic tile
- The most common type of decoration material in the toilet. Noble designs and excellent characteristics have made ceramic tiles indispensable in the decoration of premises with the expected high humidity.
- You can buy it in different price categories and different sizes. Depending on the size of the toilet room, either large-format tiles or mosaics are chosen. A combination of different sizes, textures and colors will also look beautiful.
- The disadvantages include only the difficulty of doing the work yourself, if there is no experience and a large amount of dirt during the repair.
Ceramic Tile Toilet Repair Technology
- Since the tile is attached directly to the walls, at first, for all communications, the channels will be chipped. Having laid wires in them, they cover with putty on top.
- Next comes a primer coat with antifungal additives. It dries quickly, but it is better to apply at least 2 layers.
- If the ceramic tile is attached to a concrete base, then you can immediately start applying the adhesive. If gypsum plasterboard acts as a base, then adhesion with it should be improved using a special mixture - concrete contact. This is a thick primer, in the composition of which there is coarse sand. As a result, after drying, a rough surface is formed. It is applied in 1 layer.
- For the first row of tiles, you need to fasten the starting metal profile around the perimeter of the entire room. Be sure to carefully verify it with a building or laser level.

- Glue for tiles is sold in dry form, you need to mix it in small portions (so as to manage to spend the whole batch in half an hour). To do this, glue is poured into the container with water and, without ceasing, mix with a drill or a screwdriver with a special nozzle. When the desired consistency is reached, it is left to reach literally for 5-10 minutes.
- Ready glue is evenly distributed over a small area with a notched trowel, starting from the bottom, from the mortgage, and up. The first tile is fixed in the corner, immediately put the next one, measuring the evenness of the seam with a cross or a match. Crosses should be installed perpendicular to the wall, and not buried in the adhesive solution. Thus fill the entire area. Side tiles must be measured in advance and cut off excess with a tile cutter. It is quite difficult to work with a manual unit, very often there are chips or uneven edges. Therefore, the supply of finishing material should be sufficient to compensate for such a marriage.
- It is unlikely that corner joints can be made perfectly if there is no experience with ceramic tiles. But they can be closed with special decorative corners.

- Passing the entire wall from the bottom up for 1 time is not recommended, due to the large weight of each tile. Therefore, having made 3-4 rows (depending on its size), it is necessary to leave for a day so that it dries out and grabs the wall.
- Having finished laying the tiles, they wait a couple of days for it to fully strengthen. Then all the crosses are removed, and the seams are filled with cement grout. It also dries very quickly, so you need to breed it a little bit. For application, a rubber spatula is required. To make the seams beautiful, after drying they are leveled with a slightly damp sponge. On this work is completed.
- On the floor, tiles are laid out in a similar way, with the only difference being that the entire amount of work can be done at once. For grouting, it is better to choose a mixture of dark or gray color, since white or light seams quickly become dirty under your feet.
Toilet Repair Wallpaper
More recently, wallpapers were glued in toilets as a very cheap finish. They quickly absorbed unpleasant odors, and they didn’t look very beautiful. But modern materials have high technical characteristics that allow the use of a number of special wallpapers for finishing the toilet.
- If there is high humidity in the bathroom or poor-quality ventilation is mounted, then it is better to abandon the usual paper and vinyl wallpapers. It is not recommended to use natural materials based on bamboo or reed.
- But fiberglass, washable vinyl or non-woven models, as well as wallpapers with a durable waterproof coating of polymer or synthetic materials, will do. One of the modern types is stone wallpaperThey are made of real stone, but so thin that they are easily rolled up and glued to the walls. At the same time, retaining all its strength and moisture resistance.

- All of these types are suitable for washing with a damp sponge using non-alkaline detergents (soap or dishwashing liquid). Since over time, a fungus forms on the walls of the toilet, which is a plaque that resembles dust, but does not wash with a dry cloth. Or the usual blue mold.
- Another type of toilet-friendly wallpaper called liquid. They are on sale only in dry form, and before use they must be mixed with water in the right proportions. They have a rather voluminous structure and look a bit like decorative plaster. But, despite this, they will not close the flaws and roughnesses of the walls. Therefore, they need to prepare the base also carefully. As for other wallpapers. If repairs are necessary, this is quite simple. It is enough to simply soak the desired area with water and either clean and apply a new layer of the mixture, or simply smooth the existing one.
Tsugunov Anton Valerevich
Reading time: 6 minutes
Repairing a toilet in an apartment is not an easy task, despite the seemingly small amount of work. The lion's share of difficulties is associated with the size of the room and with the installation of plumbing and pipes in the toilet: risers, wiring, sewers. Of course, it is better to entrust specific works to professionals, but redecorating can be done without outside help. Let's find out how to do it, saving time, nerves and money, and find out where it should start.
In what order are the toilet works?
Even a small toilet repair in a prefabricated house will require a large number of diverse tasks. In this small room there are many different communications: piping, sewage, heating, lighting. Often, replacement of the toilet itself is also required. In some cases, a defective overhaul may be required.
First you need to determine the sequence of repairs in the toilet. Repair begins in the old house or in a new building with the development of design and calculation of the necessary materials. It is advisable to carry out further repair steps in the following order:
- removal of old coatings from the ceiling and walls;
- replacement of heating pipes and sewage pipes,;
- wiring replacement (if necessary);
- cleaning the room;
- floor preparation, pouring screed, laying flooring;
- installation of wall coverings (wallpaper, tiles, panels);
- if necessary - assembly of a plumbing cabinet;
- installation of a toilet bowl;
- installation of a new door.
Even the most modest repair in the toilet takes a lot of time and requires significant investments, since plumbing is expensive. The most inexpensive repair option in the toilet is a simple cosmetic, when they do not change the drain or wiring, but only refresh the ceiling and walls.
Toilet design
Quite often, the toilet is a tiny room in which, as they say, does not turn around. In houses of the 137th series, the toilet, which in addition to the riser and pipes also houses the ventilation shaft, is so small that there is practically no free space between the toilet and the door. Within such a small room, designing before starting repairs requires a special approach. When thinking over, it is necessary to consider some important nuances.
- The central object of the toilet is the toilet. First of all, it should be convenient. Snow-white sanitary ware looks best, although another color can be chosen. The main thing is that she fit the general interior.
- A great option for a small room is the built-in toilet. This is a practical solution: the tank and sewer pipes are cleaned in a plumbing cabinet, they do not accumulate dirt, dust, germs. Cleaning becomes much easier. In addition, the toilet on the installation moves a few centimeters deep into the toilet, which makes staying in a small room more comfortable.
- Most often, heating risers and water meters are installed in the toilet. They are also recommended to be sewn into a beautiful plumbing cabinet. The interior will only benefit from this. Opposite the counters and taps, a hinged hatch must be provided so that at any time it is possible to shut off the water or see the readings.
If you are tired of standard solutions, you can search for ideas on the Internet and create an unusual toilet interior in a new building. An interesting option is demonstrated by the following photo.
You can decorate the toilet with wallpaper or paint the walls in an unusual way, but aggressive colors or excessive variegation should be avoided.
A black-and-white toilet will look stylish and non-standard, especially if you choose black plumbing in high-tech style.
Toilet Repair Materials
The load on the toilet is quite specific. There is often high humidity, pollution and unpleasant odors are frequent. Therefore, in the toilet should be used finishing materials that do not absorb odors and dirt, resistant to high humidity, easy to wash.
To repair and level the floor surface in the toilet, it will be advisable to use bulk floors. The mixture should be prepared on a cement basis. For decoration, it is advisable to use porcelain tile.
To align the walls of the toilet in the new building, you can use drywall, but only its moisture-proof modification (the hallmark is the green color of the sheets). For the frame, aluminum profiles are recommended, because the wood rots quickly from dampness and is affected by the fungus. You can glue tiles on drywall, apply paint or wallpaper.
The ceiling surface can be painted or a stretch ceiling made of PVC film can be installed, which will help prevent damage to the finish in case of leakage from neighbors on top.
The doors to the bathroom can be either standard or smaller, as in the 137 series houses. And this creates a lot of problems for owners, because finding such a canvas can be problematic. Here you can give only one recommendation - the door should be blank.
Start repair
When all questions on materials are resolved and the design is selected, you can begin the repair process. Where to start repairing the toilet? From the dismantling of old materials: remove the toilet, remove the cover, wallpaper, remove garbage, etc.
Repairing a toilet in a new building is easier: there is no need to change pipes, dismantle the old finish.
The next stage of repair is the installation of a new sewage system. Now they use plastic. It is much lighter and cheaper, but not inferior in strength to traditional materials. When buying any plumbing kits, you need to check if all the rubber bands are in place. If they are not enough, there may be problems with sealing the joints.
Then they change the pipes and wiring. Risers are now also made of polypropylene. They must be rigidly attached to the wall, especially a pipe with hot water, because under the influence of high temperatures they can be deformed. With the economy version, the pipes are not touched, because the price for repairs from this increases markedly. If the toilet is suspended, the installation is installed at this stage of the repair.
When making electrical wiring in the toilet in a new building, you need to remember that the wires must be hidden in a special corrugation, and junction boxes and wire connections must be removed outside this room.
Another point is ventilation. Often it is clogged, so you need to clean it and close it with a special grill.
For effective ventilation, it is advisable to equip a forced draft.
Repair is being completed by installing a toilet bowl and assembling a plumbing cabinet.
Repair Cost
Knowing how to repair the toilet and what kind of work you have to do, you only have to decide whether you can do it yourself or better to entrust part of the work to professional craftsmen.
The price of a turnkey toilet redecoration in Moscow ranges from 14–25 thousand rubles, in St. Petersburg such repairs will cost 10–22 thousand rubles. The price of major repairs with the replacement of pipes starts from 35 thousand rubles.
You can save money by completing some of the work yourself, for example, dismantling the old coating, screeding, etc. If you have no experience in performing any operations, you can watch training videos and look through photos in search of inspiration.
Before starting the repair of the toilet room, most of us think, firstly, about choosing suitable materials for decoration, and secondly, about developing a beautiful interesting design that would allow us to hide the lack of space. Crowding can be effectively controlled with visual techniques that help expand walls, raise the ceiling, or change the geometry of a room so that it looks harmonious. And for the decoration of such a room, the modern construction market offers a lot of practical and original materials. Today we will tell and show how stylish and cozy an ordinary toilet room can be - photos of more than forty-five illustrative examples will help you to make sure of this.
How to make a toilet repair yourself?
Consider a situation where a home toilet requires major repairs. This event is quite laborious, despite the modest dimensions of the field of activity, and usually consists of the following steps:
- Alignment of walls;
- Door replacement;
- Leveling and raising (if necessary) the floor;
- Laying plumbing communications and replacing old plumbing;
- Installation of false walls or niches for concealing water purification filters;
- Installation of shelves or cabinets;
- Finishing the ceiling, walls and floor;
- Installation of lighting devices and accessories.
Many are perplexed by the very concept of “toilet room layout”, because usually on such a small piece of free space it is considered sufficient to at least successfully place a toilet bowl and a water heater. However, even the interior of the toilet room in the Khrushchev apartment can be functional and ergonomic. The video below describes how to repair a small toilet with your own hands, spending a minimum of resources, and without even resorting to laying tiles, but simply pasting the room with waterproof vinyl wallpaper:
Practice shows that most owners still prefer to use ceramic tiles to decorate the toilet room. This is a universal solution, because the tile meets all specific requirements: it is resistant to high humidity, easy to clean, does not lose its excellent appearance over time. But there are other finishes, no less practical and beautiful. We suggest you take a look at the most interesting photos of toilet rooms after repair:


Features of finishing the small toilet
Let's move on to the methods of visual correction of small, narrow, low and disproportionate toilet rooms. The first and main tool in this business is color. Shades of light and cool spectrum have the ability to visually expand any room. And this property is definitely worth using.
Tip If the toilet room is small, use light cold shades for interior decoration: white, silver, lemon, sky blue, soft lilac, purple or pink, as well as light shades of the color of the sea wave.Great care should be taken when using bright and dark colors. In many fashion magazines on interior design, you can find photos of examples of the design of toilet rooms in a bold, flashy style using black, red, orange and burgundy tones. Please note that, most likely, the interior of the toilet room, the photo of which you are considering, is much wider and more spacious than yours.


In fact, there is a spacious toilet room only in two cases: if it is combined with a bath, or if such a decision was laid down by the project, and we are talking, for example, about a private wooden house. And the owners of apartments of mass development are forced to face a common problem - the crowded toilets.
Important According to the norms of SNiP, the minimum toilet depth in a residential building is 1.2 m, the width is 0.8 m, the ceiling height is 2.5 m if it is horizontal, and 1.1 m above the level of the toilet if inclined (attic). The area of \u200b\u200bthe toilet is at least 1.2 square meters. m, and the toilet room with washbasins - 1.5 square meters. mAnother important aspect in the design - the right choice of pattern. The design of walls with large ornaments or laid panels requires a certain distance for adequate perception. And in our case, there simply will not be such a distance, so attempts to decorate the interior with landscapes, portraits or large bouquets of flowers are unlikely to be successful. Below you see several interesting options for the design of the toilet room, the photo gallery shows examples of modest interiors:


Tile, wallpaper and plastic panels in the interior of the toilet
Now we begin to consider the range of finishing materials. The first thing that comes to mind is tile. We have already talked about the choice of shade and pattern, but in the case of a tile, its geometric shape, location method, dimensions and combination can also come to our aid. Here are the most relevant ideas for the toilet:
- If the toilet room is very narrow, lay a rectangular tile on the floor so that the long side is located along the short wall;
- If narrowness and crampedness are combined with sufficiently high ceilings, you can level the situation by making a border of tiles approximately at the middle of the height of the wall. In this case, the upper part is better to trim in a lighter color, and the lower part in a darker or brighter;
- If the room is the other way round, the ceiling is too low and the width is sufficient, you can place vertical inserts of contrasting or patterned tiles on the walls;
- Laying tiles on the diagonal, both on the walls and on the floor, is a universal technique that allows you to harmonize and expand any cramped room. But such repairs will require a large supply of materials, because there will be many scraps.
Tile for the toilet room (see photo below) can be of different sizes, but keep in mind that too small as well as huge tiles look disharmonious in small interiors. Therefore, mosaic and large floor porcelain tiles should be used with caution, and only if such a solution is justified by the general design concept.


Wallpaper - The simplest and most logical answer to the question of how to design a toilet room beautifully and at minimal cost. To repair such rooms, you should choose special moisture-resistant wallpaper, which can be distinguished by the corresponding markings on the roll. This can be vinyl or non-woven fabrics, as well as modern liquid wallpaper, which is applied to the walls with a roller, and covered with a water-repellent composition after hardening. Below you see how varied and interesting the wallpaper for the toilet room can be, photos confirm this:


Plastic panels also meet the requirements of moisture resistance, in addition, they are easily exposed to wet cleaning, and do not lose a presentable appearance over time, unlike wallpaper. But in the process of repairing the walls with their use, installation of the crate is required, and this, in turn, will take away part of the area, which is so small. Therefore, we would recommend recommending such material for interior decoration of the toilet only to those who do not complain about crowding.
Cabinets, shelves, furniture and accessories for the toilet room
Beautiful toilet rooms are made up of many elements, including not only a stylish finish design and high-quality plumbing. A harmonious and finished interior is impossible without convenient shelves, cabinets and other useful accessories. It may seem strange why we even started talking about furniture in relation to the design of the interior of the toilet? In fact, this definition means not only the room in which a person can send natural necessities.
It is interesting A “toilet room” is a place where a person can put his toilet in order, that is: wash his hands, wash, comb his hair, and fix his makeup and clothes. And for this you need a mirror, washbasin, towels or napkins.Such complex facilities are often provided in public institutions, as well as on the ground floor of private houses, where they are intended primarily for guests. But in a modest toilet of an ordinary apartment, you can provide convenient shelves for storing air freshener, household chemicals and other attributes. The video below shows how to equip a small toilet with a full and functional storage system:
There are even more elegant and stylish design options when the closets for the toilet room are completely hidden behind the walls. At first glance it’s not even clear that there is a cabinet there - the interior looks absolutely integral and very neat:
It is also very important to choose suitable accessories for the interior: a toilet paper holder, a brush, as well as towel hooks, a soap dish and a toothbrush holder, if there is a washbasin in the room. Here are some stylish accessories you can buy in modern building stores:


How to decorate a toilet room: unusual decor, decoupage and lighting
To give a unique personality to your toilet room will help the imagination and skill that almost every housewife possesses. DIY items made with love will be a wonderful complement and decoration of the interior. For these purposes, magazine clippings, old photographs, beautiful pictures, dried plants, pebbles, shells, knitwear, as well as paints and brushes will do. What can be made of such a strange set, you ask? All this will come in handy for decorating the toilet using the decoupage technique.
It is interesting The French word “decoupage” literally means “carving”. Using this technique, even a person who does not know how to draw can beautifully decorate any surface using fragments of pictures, or painting objects through a stencil.Proper lighting plays a very important role in shaping a beautiful interior design. Stylish, original and well-positioned fixtures for the toilet room can visually expand a cramped room, harmonize it and set the emphasis on a certain part of it. Below you see successful examples of lighting, as well as decor, created by your own hands:


What style to choose for the design of the toilet room?
Even before the start of the repair, many are thinking about choosing the style of the future room. Even for such a modest-sized room like a toilet, this question is very relevant. If you withstand the entire interior in a certain style concept, an excellent result is guaranteed. It remains only to choose the appropriate style. For example, a Provence-style design is perfect for both private wooden houses and apartments where the lady is a lady who loves provincial romance and sophistication. And for active, energetic natures who prefer functionality and conciseness, one can recommend strict high-tech or Japanese minimalism. The photos below will help you make your choice:


Answers to frequently asked questions about design and decoration
How to rationally equip a toilet with an area of \u200b\u200b1x1.5 m with a ledge?
The main purpose of the design of the toilet is the most efficient use of a small area. The toilet should be compact, preferably hanging. Save space completely, or partially integrated in the wall of the drain tank - then it does not look so massive.
A small washbasin will also fit in a space of 2 m2. This may be an angular model located on a wall with a protrusion. A small towel holder with a mirrored facade can be hung over the washbasin - it will give the room additional volume.
For wall cladding, it is preferable to use glossy tiles in light shades. If the color of the walls is white, you should definitely dilute it with bright elements, otherwise the room will turn out faded. Small toilet design example - photo. 
What is important to consider when repairing a toilet yourself?
Often, apartment owners, repairing the toilet on their own, forget or incorrectly organize access to taps for blocking water, meters, a sensor for regulating the operation of the warm floor. Counters can be located on any cut section, but at such a height that will be convenient for taking readings, repairing them, or replacing them without damaging the wall and plumbing fixtures.
Similarly, the location of stopcocks should be considered. It is much more convenient when they are above the drain tank than under it. Most often, meters and valves for shutting off water are located on the wall behind the toilet. Therefore, it is important to organize access to them by installing special doors. It is a good idea to cover this wall with roller blinds, then in case of breakage, or the need to replace equipment, you do not have to destroy the wall. An example of how to get access to communications when repairing a toilet is a photo. 
In what style will the design of a small toilet look advantageous?
A small bathroom is better not to clutter up with an abundance of accessories and various accessories. Optimal styles for its design:
- minimalism - concise, restrained. The color scheme is calm, based on a combination of 2-3 colors. Sink and toilet bowl of simple shapes, compact and comfortable. Of the accessories, it is better to leave a small mirror and an original lamp;
- classic - elegant restraint and chic. For the decoration of the room, pleasant pastel colors, streamlined plumbing are used. The decor is presented by an elegant door handle, a paper holder, a crane;
- eco - gives a feeling of rapprochement with nature. Light warm colors, natural materials are used for decoration. This style is ideal for decorating a bathroom in a wooden house.
Before proceeding with the design of the bathroom, it is recommended to visualize the project to make sure that it is ideal. Successful modernist design of a small toilet - photo. 
What you need to know when choosing tiles for toilet lining?
The popularity of using tiles in the toilet is due to its practicality, durability, and a variety of decor. It may vary in size, shape, and technical specifications. With large loads, porcelain tiles are installed on the floor, tiles and mosaics are installed on the walls.
When choosing toilet tiles, remember:
- floor tiles are not suitable for wall cladding, since it has a large weight;
- wall tiles are not suitable for flooring, as it may crack from load;
- material for lining the bathroom should be purchased with a margin of 10-15% (for technical needs).
An example of how floor and wall tiles for a toilet can be harmoniously matched - photo. 
What to look for when decorating a small toilet?
Making the interior of a small toilet is more difficult than a spacious bathroom. To make the room more attractive will allow well-chosen finishing materials and plumbing. The best option is to finish in several tones of the same color. This will create the effect of expanding the space.
The interior of a small toilet will turn out to be more attractive if all pipes and communications are hidden. To mask them, it is better to use lightweight constructions that can be easily disassembled in case of an accident.
An important role in limited space is played by proper lighting. In the toilet, it is better to install one small lamp in the center of the ceiling, or several small ones along its perimeter. You can also highlight the mirror, shelves - the interior of the toilet, photo. 
Can I use murals to decorate the walls of the toilet?
Photowall-paper - a universal means of decoration of an interior, it is admissible to apply them also in non-residential rooms. If you want to contemplate a beautiful landscape during hygiene procedures, you can glue such wallpaper on the toilet.
The design of this wall covering is selected depending on the area of \u200b\u200bthe room. A large bathroom will decorate any landscapes, city panoramas. Wall mural for a small toilet should visually expand the space. If the paintings will be located behind the toilet, it is better to choose a vertical pattern (abstraction, flowers, but not stripes). The floral theme of the photo wallpaper will bring a feeling of freshness, proximity to nature to the room. Perspective images (road leading into the distance, view from the balcony) will create the illusion of an increase in volume. Representatives of the stronger sex like the imitation of book shelves on the walls, turning the toilet into a kind of office. 
What is better to finish the walls of the toilet, so that it is budget?
One of the most inexpensive is the finish of the toilet with plastic panels. Its advantages:
- low cost;
- ease and speed of installation (no need to pre-align the walls);
- practicality (it is easily cleared of pollution);
- moisture resistance;
- strength, durability.
When choosing plastic panels, you should pay attention to stiffeners - the more they are, the stronger the material. The optimum sheet thickness is 8 mm. It is better to buy panels from one batch, the pattern on them will be of the same intensity. In what sequence is the toilet finished - look at the video:
How to increase the functionality of the toilet?
To design not only a beautiful toilet, but also a functional one, it should be supplemented with various accessories. Small narrow shelves will not take up much space on the wall, but they will allow you to place the necessary appliances there (household chemicals, cosmetics, air freshener, toilet paper, towels). Shelves mounted asymmetrically on opposite walls look interesting.
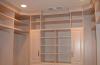
A medium-sized toilet will even fit a small cabinet. It can be made to order, given the size of the bathroom. The design can be open type, or equipped with frosted glass doors. It is better to give preference to a closed cabinet, as it makes the space more organized, tidy.
It is also important that the furniture, plumbing and decoration are made in the same style. An example of how functional and beautiful toilet rooms can look is a photo of design in a retro style. 
Is it possible to remove an old toilet bowl in one day, put a floor tile in the toilet and put a new toilet bowl?
All repairs are carried out according to a clear technology, and this takes some time. Removing the old toilet, breaking it, takes 10 minutes. If dismantled without breaking, half an hour. And then it all depends on the quality of the rough floor. If the screed is even, laying the tiles will take 1-3 hours (depending on complexity). The drying time of the adhesive is indicated on the package, as a standard it is 2-4 days. Only after this time the joints are grouted and a new toilet bowl is installed.
You can speed up this process by purchasing quick-drying tile adhesive. It dries completely in 4-6 hours. After that, you can fix the toilet, and grout the joints the next day, after the glue has completely dried and the tile for the toilet is fixed - photo. 
In what sequence is it right to install plastic panels in the toilet?
When repairing the toilet with plastic panels with your own hands, special attention should be paid to the construction of the frame. It can be executed:
- from wood;
- metal;
- plastic.
In the bathroom, it is recommended to install a metal or plastic crate, since fungus and mold can accumulate under the wooden. Using self-tapping screws, the profiles are fixed on the walls in increments of 40-50 cm. If the PVC panels are placed vertically, the crate will be made in the horizontal direction. On the ceiling and floor set starting U-shaped profile.
Installation of the panels starts from the corner of the room, inserting the mounting shelf into the start profile. Next, the material is attached to the crate using a construction stapler. The next panel is laid in the groove of the previous one. Thus, sheathing is performed around the entire perimeter. In the corners, special corners are used to connect the parts. At the end of installation, the joints near the window and doorway are sealed with sealant and covered with decorative strips. 
Can I complete the toilet myself?
The design of the toilet in the apartment is complicated by the fact that it is necessary to correctly install and connect plumbing. If you have no experience in performing such work, it is better to entrust it to a professional.
Finishing the walls, ceiling and floor is quite possible to do it yourself. This requires knowledge of the installation technology of certain finishing materials, basic skills for working with them, tools and accessories for styling, attentiveness, accuracy.
The level of complexity of repair work depends on the finishing material. The most time-consuming is laying tiles, in addition, it is also heavy, fragile, expensive. If you do not have the skills to work with this material, it is better to call a good master.
Also, certain knowledge of technology and skills requires the implementation of rough work - alignment of walls, floors, waterproofing. Violation of technology threatens that the finish will crack, or fall off and everything will have to be redone.
Special preparation does not require wallpapering, installation of plastic panels - they can be done independently. 
What wallpaper can I use on the toilet?
A bathroom is a place of high humidity and frequent operation, therefore, finishing materials should be durable and practical. If you decide to decorate the walls of the toilet with wallpaper, then choose vinyl linens with a special coating that makes them resistant to moisture and other negative influences. The material is practical, easy to clean, easy to install, has various colors, patterns. Paper sheets for taping the bathroom are not recommended.
Before decorating the walls in the toilet with wallpaper, they should be treated with an antifungal composition - this will protect the coating from mold formation. It is also necessary to choose high-quality glue, moisture resistant. But even if you use expensive, dense washable cloths, in places where there is a risk of water ingress, it is better to put a tile laminated with MDF. 
What is the best way to close the back wall of the toilet in Khrushchev, where pipes run?
The most difficult thing when designing a toilet in Khrushchev is to achieve a functional and aesthetic decoration of the wall with a riser. It should be remembered that the pipes cannot be sewn up tight; in case of breakage, the structure will have to be broken.
There are several options for decorating the wall with communications in the toilet. If the pipes pass in a corner of the room, they can be sewn up with a plasterboard box, having mounted a hatch revision to access the meters and valves that block the water. Near the box there will still be free space for installing shelves, a water heater.
If the back wall of the toilet is fully equipped with pipes, it can be closed completely with a collapsible box. Suitable for these purposes are laminated chipboard 16-18 mm thick, wooden panels, from which you can build a structure with an opening door. The photo below shows the repair of the toilet in Khrushchev - before and after. 
You will also be interested in:
Tsugunov Anton ValerievichTour time: 5 minutes The modern design of the premises is often not ...

Do you want to make a bath in the house? Be prepared to meet serious requirements and ...
The easiest way to update the exterior walls of the house and give them uniqueness is ...

Trimming gooseberries is not a whim of perfectionist gardeners, but the most important procedure, from ...
If you have empty niches in your home, you can fill them with built-in wardrobes ....

