


Sheathe the steam room and washing in the bath is necessary only with natural materials. In no case should plastic be used, as when heated it can give off fumes that are unhealthy. Also, do not use ceramic tile lining - this is a practice from the Soviet era, when wall tiles were used in public baths. An ideal material for decoration is linden lining, however, it should be noted that it is not cheap.
Linden clapboard
As mentioned above, the best lining for a bath is lime. Compared to pine lining, linden is much more expensive, but has serious advantages:
- Does not emit tar;
- Has a pleasant smell;
- Not very hot, i.e. has low thermal conductivity;
- It does not darken for a long time under the influence of moisture.
The quality of linden lining allows you to use it in the zone of high temperatures and humidity, namely in the steam room. Naturally, in the steam room, it is necessary to use linden lining not only for upholstering walls, but also for the manufacture of shelves. Shelves from linden are much less heated than shelves from pine.
Aspen Clapboard
Aspen wall paneling has many advantages of linden wall paneling. It is especially necessary to note that aspen is quite resistant to decay. Not many people know that aspen was used in Russia in the construction of wells.
Unfortunately, the process of processing aspen wood is quite time-consuming, which is why many people cannot afford the cost of lining.
Lining from a cedar
The coniferous smell excites the soul! Perhaps the best coniferous tree for making lining is cedar. Cedar lining has even lower thermal conductivity than linden and aspen, however, it is quite difficult to find a lining from real cedar. Very often, under the guise of cedar lining, a lining of cedar pine is sold. The fact is that cedar does not grow in Russia. What we call cedar is cedar pine, which produces resin when heated.
Pine lining
Lining from pine is the cheapest option for lining the bath. However, you should not use a pine lining for cladding a steam room - the pine tree is very hot, which can cause a burn.
Pine lining is quite suitable for washing, where the temperature is not high. You can also upholstered a pine dressing room.
Lining selection: classes A, B, Extra
How to finish a bath clapboard do it yourself
If you wish, you can beat the bath lining yourself. Below is a video created by comrades from Finland who know a lot about baths, or rather saunas.
Material for work:
- Reiki for a lathing;
- Screws for fixing the lathing. If the walls of the bath are made of lightweight concrete (expanded clay blocks or aerated concrete), we recommend using lightweight concrete screws Sormat KBRM, which have a nano coating that will not allow them to rust under the influence of increased moisture in the bath;
- Insulation;
- Aluminium foil;
- Aluminum tape for gluing the joints of the foil;
- Lining;
- Nails (preferably stainless steel);
- Polyurethane foam;
- Staples for a construction gun.
Laying insulation and aluminum foil
As already mentioned, the video is in Finnish, but without the Russian translation everything is clear.
Covering the ceiling and walls. Installation of fixtures
On Russian-language sites it is often said that the lining should be nailed vertically so that moisture does not accumulate in the locks of the lining. With regard to the sauna, this rule can be neglected, since the humidity in the sauna is less than in a Russian bath.
Please note that the lamp is located so that it is under the shelf.
The use of foil foam and nailing the lining at an angle
To make the bath not just warm, but super-warm, instead of foil, you can use foil foam, which will turn the bath into a sealed thermos.
The video shows that the foil foam has a lock. Moreover, the connection of the sheets is foamed with polyurethane foam, plus it is sealed with adhesive tape made of foil.
Lining is considered an ideal solution for decorating a steam room, because it is a natural tree that creates the necessary atmosphere and holds heat well. When planning lining the lining inside the bath with your own hands, you should consider all the necessary nuances. Even minor deviations from the rules threaten that the coating will not perform its functions and will quickly become worthless.
Cladding the bath with clapboard involves the use of materials that can withstand certain conditions that are characteristic of this room. These include:
- High temperature performance.
- Constant moisture changes.
- The ingress of water and various substances.
Therefore, it is necessary to carefully approach the selection of products. It is believed that the best option would be just the lining. This is due to the following factors:
- Reliability of fixation due to the large size of the groove system.
- The presence of compensation slots located on the wrong side. They prevent cracking of elements.
- Good quality impregnation with protective equipment, which is carried out directly at the factory.
 Eurolining - the most reliable material for finishing the bath
 On a note! For work, material of the first or highest class (grade) is used. There are no damages and knots that will fall out over time.
Timber selection
The bathhouse consists of several rooms that perform certain functions. It is advisable for each room to provide for the presence of a certain species of wood. It must be borne in mind that not every type can be used for this kind of decoration.
Linden
 Linden - a frequently used version of the lining for finishing the bath
 One of the most popular options. Lipa is able to create a microclimate in the room, which will be saturated with cleanliness and comfort. We must not forget about the excellent qualities of such material. Boards are strong, resistant to various influences, retain color and structure for a long time.
Aspen
A feature of this species is that from time to time it only becomes stronger. This product is easy to work with. Even after a long time when the tree darkens, it is enough to sand it to return the rich color of the surface.
The above options can be used in all parts of the bath, but most often they are used in the steam room.
 Aspen lining is most often used in a steam room
 Cedar
It is allowed to use it even in steam rooms, but this breed heats much stronger than deciduous, therefore, discomfort from contact can occur at high temperatures.
 The product made of cedar tends to get very hot.
 Pine and spruce
Such types are used mainly for washing and dressing room. The fact is that these rocks intensively secrete tar and quickly heat up. But it should be noted that this option is much cheaper than the previous ones and has a wide decorative range.
On a note! Coniferous trees need additional processing - resins, otherwise there is a high probability that the surface of the walls and ceiling will be covered with numerous streaks.
 Lining from coniferous varieties of wood is most often used for finishing the dressing room and washing
Choosing a mounting method
Do-it-yourself cladding of the bathhouse with the choice of the layout of the elements. There are two main ways: horizontal and vertical. Each of them has its own advantages and disadvantages.
Horizontal option
The horizontal option has the following advantages:
- It is assumed that the fastening will be carried out with a spike top, which will reduce the likelihood of water entering and stagnating.
- This method is also good because the frame for it is carried out vertically, which means that air will circulate more evenly in the resulting space.
- Also, one cannot exclude the possibility that boards, even the highest quality ones, are subject to decay. This happens especially quickly at the very bottom. Horizontal fastening technology makes it possible to replace only the material that has actually been destroyed.
- With this installation option, drying out is less noticeable.
 The horizontal option of fixing the lining in the bath
 We must not forget that oak is considered one of the highest quality, but its cost is very high.
Vertical option
The interior decoration of the bath with a lining in a vertical way is quick and easy. This technology has its advantages:
- Any moisture drains faster on vertical elements.
- The groove-crest system is less susceptible to stagnation of water and destruction.
- This circuit saves indoor temperature.
 Vertical interior design
 It is believed that this option is most suitable for dry steam baths.
Lining installation
The lining from the inside of the bath or sauna is carried out on the crate. It is made exclusively of wooden beams, which are pre-treated with various antiseptics and primed.
Important! You can not use a metal profile for the frame, even the galvanized options in the steam room will quickly become worthless.
Crate Creation
The technology is as follows:
- The beam is carefully prepared. For work, not a planed version can be used, but it is necessarily processed by impregnation.
- The racks are mounted clearly perpendicular to the location of the lining. Naturally, if a combination of vertical and horizontal schemes was conceived, then it is necessary to calculate in advance the correct location of the beam.
- The profile is attached to the wall on the dowel. It is taken into account that the size of the beam should be larger than the width of the insulation, if an option is used that fits into the free space.
- The distance between the racks should be 50-60 cm. The correct mounting is checked by level and plumb.
- If unevenness is found, then trimmed boards are additionally added. In the case of strong curvature - suspensions are used for the frame of gypsum boards.
 Installation of the lathing in the bathhouse under the lining
 On a note! It is necessary to take care of good ventilation. It is arranged in two places. The first hole should be located under the ceiling, the second - at a distance of 30 cm from the floor.
Lamella fastening
How to fix the lining in the bath? The most effective way is considered to be hidden fastening (carnations and kleimers). There are several explanations for this:
- If the fasteners are twisted through the front part, then there is a high probability of touching this place, which will lead to unpleasant sensations (a small burn).
- Metal is susceptible to oxidation, which means spots may appear that spoil the entire decorative look.
- The visible mount indicates that the master was too in a hurry to finish the job, neglecting the appearance of the room.
 Installation of lining by means of hidden fasteners
 The work takes place as follows:
Stage One - Ceiling.
All events begin with a ceiling design. The fact is that it is here that the necessary thermal gaps are left.
- Laying starts from the entrance to the room. Kleimer is used as fasteners. It reliably fixes each element, which cannot be said about nails.
- Lamels are placed at a distance of fifty millimeters from the walls, which will compensate for possible deformations. It will also serve as a ventilation gap allowing air to circulate.
- The first fragment fits in its place and is fixed with hidden carnations. Next, the kleimers are installed.
- Products are grooved. Now only kleimers are applied.
- The last element is difficult to stack, so it is fixed on hidden carnations.

Stage two - work with the walls.
The technology exactly repeats the one used for the ceiling. But the following is taken into account:
- The presence of capillaries in the wood makes it possible for water to rise a certain distance, and therefore it is advisable to leave a technical gap. For this, 15-30 mm recede from the floor.
- The boards are adjacent to the ceiling, but for the walls the lamellas cannot be connected through the groove to the stop. The fact is that the tree is in constant motion, so space must remain.
It should be borne in mind that violation of such simple rules leads to the appearance of swelling and deformation.
 Cladding the walls with clapboard involves observing simple rules
 The technology used makes it possible to sheathe the bath with clapboard in all rooms.
You should know! Lining should not be placed next to the furnace and chimney pipe. But the place around the heater can be sheathed with hardwood lamellas.
Stage Three - Additional Processing.
After the installation is completed, carry out additional processing of the lining. This is necessary in order to protect the tree from destruction. The work is carried out with various impregnations on a natural basis. Waxing is best when waxing the surface thoroughly. The number of layers depends on the type of room. One is enough for the steam room, and at least two for the washing.
 To protect the lining from destruction, carry out additional processing
 It is important to acquire high-quality impregnations that have the necessary certificates.
Everyone wants to know how to properly sheathe the bath room and save a little. There are some options for this:
- For each room, different wood should be selected. For example, places in the steam room where it is supposed to lie or sit are faced with hardwood, the rest are cedar. Dressing room and washing - ennoble only coniferous options.
- You can also lower the grade (class) of lining. If the rest of the rooms need high-quality material, then the dressing room looks great with a surface on which there are traces of knots and different colors.
- It is better to carry out all the work yourself. This will not only significantly save money, but also be sure that all activities are carried out exclusively with high quality.
Nowadays, there are many finishing materials, but most of them are not suitable for a bath, because they do not have the necessary degree of thermal insulation, and are not suitable for operation at high temperatures. And can you imagine a Russian traditional steam room, upholstered in plastic or tile?
Cladding a bath lining would be the best option. The warm color of natural wood will create the right atmosphere, the board is pleasant to the touch, perfectly retains heat. In addition, she has one more advantage: thanks to a special design, everyone can independently install it.
So, you have decided that the lining of the bath inside the clapboard is what you need. How to cope with this task with your own hands, which tree to choose, how to protect the skin from dampness and fungus?
Choose material
 First of all, it should be noted that coniferous and deciduous trees differ in one important aspect: the presence of resin in the wood.
Although the temperature inside the bath is not high enough to have a lot of these fumes, you should think about putting the steam room from the inside with a clapboard made of hardwood.
The rest of the building, for example, is very damp, but not melted, washing can be covered with coniferous wood, which is well resistant to moisture.

Popular hardwoods:
- Linden. Soft, light wood looks very beautiful and perfectly keeps heat. It is quite resistant to damp and has been used in Russia in the construction of baths since ancient times.
- Oak. Oak plank is very durable, has a dark color and rich natural structure.
- Alder. Inexpensive, strong and attractive material with a specific bitter aroma. In no case should there be tar on the alder - otherwise the smell of wood when heated will become too strong and intrusive.
- Birch. This fast-growing tree is widespread, so it is inexpensive. But low moisture resistance allows you to use it only in dry rooms.
Popular conifers:
- Cedar. Less tarry than its relatives, it is nevertheless sufficiently saturated with resin, and therefore very resistant to decay, durable and beautiful.
- Spruce. Spruce wood boasts excellent thermal insulation properties, which is important for a bath.
- Pine. Inexpensive and quite popular material, too resinous and quickly warming up for use in a steam room, but perfectly suitable for other rooms.
- Larch. This is a very resinous tree, dense, easily cracked during processing. However, the larch board is unrivaled in moisture resistance.
The best of the best among deciduous and coniferous can be called three trees: linden, oak, cedar. Boards of spruce, pine and alder are also entitled to exist.
Video - this is how the finished work looks like:
Create a crate
 The first step is to determine how the inner lining of the bath will be lined - horizontally, vertically or diagonally.
You might want to combine sections of horizontal and vertical upholstery - this will give the atmosphere a touch of originality. It depends on how it is planned to lay the casing, the direction of the crate depends.
 In the steam room itself, the lining of the bath inside the lining should be vertical, because moisture will condense in the grooves of horizontally laid planks, condensing on the walls and flowing down.
The crate is laid perpendicular to the future coating, in increments of 50 - 60 centimeters. Boards for it should be chosen a little thicker than a layer of insulation.
If bumps are expressed on the walls - you need to lay down plywood or thin wooden planks. In case of too uneven walls, you can use the suspensions of profile systems for drywall, pre-attached to the wall with dowels in increments of not more than 40 centimeters.
In order for the orientation of the rail to be strictly horizontal or vertical, the plumb and the construction level are indispensable. If this is neglected, the panel on top of the crate may lie unevenly, which will ruin the whole view.
The board for the crate may well be not planed, the croaker is also suitable - because in any case it will not be visible. Here, strength and reliability are much more important than beauty and accuracy.
You can also pre-coat it with an odorless antiseptic composition.
Now it’s worth mentioning the price of various lumber for finishing the steam room.
The average cost of fragrant and waterproof lining made of cedar is very high, it starts at 1100 r / m2. About the same price category refers to oak. Not everyone can afford to purchase a sufficient amount of such a board.
But the linden variety "Extra" costs about 320 r / m2. The cost of alder, spruce and pine also usually does not exceed 400 r / m2. She can afford any builder.
Views: 0
Speaking about the bath, one cannot fail to mention its excellent healing properties. Since ancient times, our ancestors spent their free time in a hot bath, thus strengthening their body. Qualitatively completing the construction of the bath and its design, you can feel for yourself its unique effects. In this article you will learn about how to sheathe a bath with a clapboard with your own hands and what materials it is better to deal with.
Comparing this material with other finishing analogues, many experts give their preference to wall paneling. But, despite this, there are both positive and negative sides.
- heat saving. Due to this, the costs of gas and firewood intended for heating the bath are significantly reduced;
- the interior decoration protects the walls from dampness, I close them with myself;
- luxurious look. Thanks to the right material, the bath becomes more aesthetic;
- long operational period.
- reduced quadrature. If the area of \u200b\u200bthe bath is large, then this, of course, will not be any problem for you. But in the case of small-sized steam rooms, every centimeter of space counts;
- ventilation of the room is carried out exclusively through open windows or doors;
- high cost of materials.
Of course, although there are drawbacks to the clapboard lining, it is not at all insignificant when compared with the advantages. This makes the choice in the direction of this material justified.
Material selection
Almost everywhere and in all elements of the decor there is a tree. This is not surprising, since this material has all the necessary technical and aesthetic properties, which are so necessary when decorating a room. But among the tree there is a large selection.
The most common breeds:
- pine;
- cedar;
- aspen;
- linden.
Four types of wood used in construction most often. Now you need to parse each view separately.
Pine
A relatively inexpensive type of wood, characterized by the release of resinous substances under the influence of high temperature. Because of this, it is almost never used in all kinds of steam rooms.

Pine has found its application as a material for finishing the dressing room and lounge. Visually, there are no differences with a conventional lining.
Cedar
It is considered the most expensive wood species for the manufacture of lining. The merit of cedar is the filling of air with aromatic resinous substances, which improve the pair effect. This material is not influenced by high temperature, unlike aspen or the same linden.
 Lining from a cedar
 If you can afford buying a cedar, then there’s nothing to think about how to sheathe a bath inside. Of course, cedar!
Important: The modern construction market, unfortunately, like any other, is not always honest with customers. Sometimes sellers brazenly try to “vparit” some cheap fake instead of an expensive cedar. Therefore, you need to be careful when buying material.
Aspen
A fairly soft pliable tree species, which is also heat-resistant. The cost of such material is small, about the same as the cost of pine. But aspen has its own characteristics, which are not observed in almost any tree species. The point is that after properly carried out drying, it becomes incredibly hard.

Knowing about all the features of aspen, many owners made handles of hammers, axes and, incidentally, all agricultural implements from it. There are practically no drawbacks as such, with the exception of one - there may be manifestations of hidden rot in a tree. Because of this, the entire product is in danger.
Linden
One of the highest priority materials is linden. Even our distant ancestors were able to appreciate its special properties. The linden is not subject to deformation or any changes under the influence of water or hot steam.

The most suitable products from this material are dishes, a door or a bench for a bath. But most often linden is used for upholstery of ceilings and walls.
Important: When choosing a lining, special attention should be paid to inspection in order to identify knots. They should not be present on the upholstery material for safety reasons. The fact is that the presence of knots can cause a fire as a result of a sharp increase in temperature in this structure.
Vertical or horizontal mount - which is better?
Many experienced bath attendants disagree: what is the best lining arrangement? On the one hand, vertical mounting creates a difference in temperature between the lower and upper parts of the boards. This in turn affects the durability of the material. On the other hand, the choice in favor of a horizontal position will reduce the drying of the boards.

Advantages of horizontal lining arrangement:
- to replace the material if necessary will be very simple;
- at the junction of the board they are very tightly adjacent to each other, so that the ingress of water through the cracks is excluded;
- air circulation with this arrangement of the lining occurs at a high level;
- installation is very simple.
Important: for horizontal mounting of the lining, the grooves should be directed downward.
Another type of installation, vertical, is indispensable for some types of baths. It is a question of those species that work at high temperatures and with dry air. The lack of water will not allow the tree to darken or rot due to seepage of water through the cracks in the joints. Holes are made for normal air circulation - this is the simplest solution.

So what kind of lining to resort to: longitudinal or transverse? It is necessary to proceed from the properties of your bath: whether it is truly Russian. Or, after all, another name is better suited to her - a sauna.
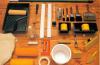
Bath Cladding Tools
After choosing the material and method of attachment, you must acquire the necessary tools. Only after this can you begin to work.
To finish the bath lining you can not do without:
- a hammer;
- electric jigsaw;
- screws and nails;
- punch;
- screwdriver;
- special stapler (meaning construction);
- a triangle;
- level;
- suspensions;
- a cord;
- plumb line.
Nails here must be used small, two-centimeter.
Video: installation of lining
Do-it-yourself bath cladding technology
Having bought material in a hardware store, do not rush to carry out installation immediately. It is necessary to wait a few days for the wood to adapt to the level of humidity and temperature. But before that, be sure to unpack the packaging.
After the lining stayed in the open air for several days, you can proceed to the main stages of work (there are only 7 of them).
Stage 1 Initially, you need to assemble a crate from a long beam. The recommended span is 70 centimeters. Fix the suspensions within them. To do this, use self-tapping screws.
 We make a crate of timber
 Stage 2. The upper and lower beam must be installed evenly using a plumb line and level. This will achieve absolute evenness.
 Building level
 Stage 3. Using screws, attach the bars to the suspensions. The length of the screws is 3.5 centimeters.
 Use screws to secure
 Stage 4. Spend processing of the finished structure with a special antiseptic. After this, you need to wait a while until the frame is completely dry.
 Antiseptic Wood Processing
 Stage 5. The gaps between the timber must be filled with mineral wool. This will also improve the insulating properties.
 Mineral wool
 Stage 6. Now put on top of a special film for waterproofing. It is attached using a construction stapler.
 Bath waterproofing
 Stage 7. Now you can start finishing. Measure the height of the bath room and cut the boards, drawing on the measurements.

Stage 8. Install the rails. You need to start from a far corner and move around the room.
 Installation of rails
 Stage 9. Make window slopes. This procedure is no different from creating plastic slopes.
 Wooden slope
 Important: You can attach the lining to the frame in various ways. Most prefer ordinary nails, although many experts recommend using kleimers for this. They are considered less noticeable compared to nails.
How much is?
The cost of lining will directly depend on the class. The presence of natural defects reduces the class. The lowest one is “C”. In second place is “B”, and the upper class is “A”. But, despite this, there are additional classes that are ranked above all. These are Premium and Extra. They are made absolutely without natural defects.
The price range for wood lining will start at 13 rubles. The maximum cost is 200 rubles per unit. The figure may vary depending on the class of material and manufacturer. Sheathing is estimated at about 180-400 rubles per square meter.
 Cladding the bath
 When wondering how to sheathe a bath inside, you need to be rational. Choose different types of wood for different rooms. For example, linden or cedar are suitable for decorating a steam room. Pine is suitable for decorating other rooms - you can save a lot on it.
Secrets when decorating a bath lining
- In the steam room and the washing room, horizontal mounting is not recommended. In this case, the material will very quickly darken due to ingress of water.
- Use only galvanized fasteners.
- It is necessary to fix the strips at a certain distance from the base - this is 5 centimeters.
- Take care of creating a ventilation system. Its presence will extend the life of the finishing material.
- After blackening, it is necessary to conduct treatment of the lining with special bleaching agents.
Video: how to sheathe a bath with a clapboard do-it-yourself
In construction, it is very important that the material is as natural as possible. The most environmentally friendly of all is wood. Wood products have a beautiful appearance and have thermal insulation properties. In addition to supporting and enclosing structures, wood is used as a finishing material. Very often the skin of the bath is carried out inside the lining. Due to its qualities, wood lining has found wide application in construction.
Types of lining and classification
Lining is divided by type of wood:
Lining from wood conifers.
- Pine. The most common wood for lining. It has a beautiful appearance and low cost. Over time, the pine product begins to darken.
- Spruce. For the manufacture of lining is used northern spruce. It is more durable and has a beautiful appearance. Like a pine, it darkens over time.
- Canadian cedar used to decorate the bath. It is not cheap, but it has excellent technical characteristics and a beautiful appearance.
Lining from wood hardwood.
- Oak. Beautiful and durable material, easy to process, expensive.
- Aspen. Beautiful light color. It has thermal insulation properties. Good for a bath.
- Linden. It is very suitable for decorating the bath, because the material does not heat up much and gives off a pleasant aroma.
- Alder. In a room with a high temperature, the material does not heat up. Also, it almost does not dry out and does not warp.
- Abash. African oak has high strength with soft material. Such wood does not dry out, does not warp and does not heat up. It has a beautiful appearance. The cost of abash is quite high.

Most often, the lining of the bath house is made of hardwood. The bath has a high temperature and under its influence coniferous wood releases resin. Hardwoods have virtually no resin compounds, so the resin does not stand out.
Of great importance is the type of wood from which the lining is made. There are 4 main varieties:


Still, the lining is divided by type of profile:
- Eurolining.
- Soft-line.
- Calm.
- Imitation of a bar.
- Block house (imitation of logs).
- Landhouse
- American.
Pros and cons of lining

Advantages:
- Natural and environmentally friendly material that does not emit harmful substances.
- Beautiful appearance. Depending on the type of wood, the lining has different shades and texture.
- Resistance to mechanical damage.
- It creates a comfortable microclimate in the room.
- Easy installation.


Disadvantages:
- The high cost of the material.
- The need for ongoing care for the wood.
Methods of fixing the lining to the wall
Listed below are 5 main ways to fix the lining to the wall.
 The easiest and most convenient way that does not require specialization. Installation is in progress with the help of small nails and grips (clamps). In this way, it is permissible to mount only light lining, as grips are not able to hold a lot of weight.
A clammer is inserted into the lining, which is attached to the guide rail using a nail, a screw or a self-tapping screw. A rail is inserted into the groove and each subsequent rail is fastened in the same way. They must be fastened tightly so that there are no gaps. If the last row of the lining does not fit completely, and a large gap remains, then the upper row must be cut to size and fixed along the guides.
 Using nails. It may seem that this method is simpler than the previous one, but in practice, chips, bruises and other damage to the material often occur. In addition, the process of performing work is not very convenient and time-consuming. Nails are driven in every 25 - 30 cm. For the installation of a rail two meters long, 7 or 8 nails are required.
First, the panel is marked in places where nails will be driven in. Then, at an angle of 45 degrees, nails bait into the edge with a groove. The panel is applied to the wall and then you can drive in nails. After installation, the hats are sunk so that the next panel of the lining easily fits into the groove. After that, the installation of the next panel is carried out in a similar way.
This installation method cannot be used for thin lining, because it will break off.
 This mounting option applies for old-style lining. The lining of euro-lining is somewhat different from the installation of an older lining. The device device is fastened with screws. To avoid splitting the wood, a hole is drilled in the places where the screw is screwed in. The drill should be smaller in diameter than the screw. The hole is countersinked to drown the head of the screw. Screw the fasteners to the limit with a screwdriver. Hats will not be visible, because they are closed by the next row of panels.
 Lining installation with a stapler and construction brackets. The bracket is driven into the groove at an angle of 45 degrees. You need to have such a stapler that is able to tightly drive the bracket to the stop. In this case, the fasteners will in no way interfere with the installation of the next row of panels.
 The fifth mounting method is most often used for finishing a sauna or bath. Screws act as fasteners. A hole is drilled at the installation sites and fasteners are screwed in with a screwdriver. The screws are tightened to that stage in order to significantly immerse the hat. To hide the screw caps, a plug is driven into the hole where it is screwed in.
Over time, under the influence of high temperature, the tree may dry out a bit, and the location of the plugs will appear. To prevent this trouble, special formulations must be applied over the plugs.
The technology of the work on the skin of the bath
- Preparatory work. All internal communications must be laid. Finishing material should already be purchased, unpacked and laid out in the room for drying. Also, you need to have all the necessary tools, for high-quality and quick work you will need:

- hammer drill;
- screwdriver;
- jigsaw;
- level;
- plumb line;
- masking cord;
- square;
- hammer;
- suspensions;
- fasteners (nails, screws, screws, staples, clamps).
- Rail Installation. Cladding the bath inside the clapboard begins with the installation of the rails, in their quality a non-planed beam is used, which is mounted vertically in increments of 700 mm using suspensions. First, the beam is fixed at the top and bottom, then over its entire height. It is important that all the guide walls are in the same plane. For this, 2-3 cords are pulled, which serve as beacons, and guide rails are fitted along them.
The bars are installed vertically if the lining is oriented horizontally and vice versa. The opposite rule is also true - if the lining is oriented vertically, then the guides on the wall are arranged horizontally.
- Carcass processing. The guide structure is treated with an antiseptic to prevent rot, mold and mildew in the wooden structure. An antiseptic also protects wood from insects. After processing, the frame must be allowed to dry for some time.
- The space between the rails filled with insulating material. Most often, mineral wool is selected. It is cut into mats slightly larger than the space between the guide rails. This is necessary so that the insulating material fits snugly against the wall and does not fall out. It is important that mineral wool mats are not overly compacted, this will adversely affect the thermal insulation properties.
- Waterproofing device. Thermal insulation material, especially if it is mineral wool, absorbs moisture, and the bathhouse is the room where there is too much of it. For this reason, thermal insulation material protected by waterproofing film. It should cover the entire area of \u200b\u200bthe wall. The film is attached to the wooden rails using a construction stapler.
- Lining. The necessary length of the lining is measured, the sawing place is marked and the material is cut. When marking, it is important to consider door and window openings. After this process, wall cladding is performed.
- Lining installation. The lining of the bath from the inside with the clapboard begins from the ceiling. A gap is left along its perimeter for deformation of the material. Wall decoration is carried out from the far corner. The first panel must be fixed especially firmly. Mounting is performed by one of the methods indicated above. If the last row of lining is not suitable in size, it must be washed down.
Lamella lining should not fit snugly together, since the material, being saturated with moisture, increases in size.
Wall paneling should be 3 cm behind the floor.- For finishing slope openings starting rails are installedto which the lamellas are mounted. Special joints are installed at the joints corner strips.
- Lining is a combustible material, therefore they are not mounted near the boiler. Brick walls are arranged in this part of the building or they are sheathed with metal sheets.
- Material processing. In the dressing room, it is better to cover the tree with varnish, which will protect and preserve it for many years. In the washing and steam rooms, the lining is covered with protective wax or stain. This will give the material a beautiful shade and help keep it as long as possible.


The skin of the bath requires significant funds for the acquisition of material and its device. There is an opportunity to reduce the cost of material. In the dressing room there is no high temperature and high humidity. Therefore, it does not require special finishing conditions. In the dressing room, you can make the lining of coniferous wood. The floor does not have to be made of wood, but it can be made of ceramic tiles.

In the steam room itself, it is best to cover the walls of the ceiling and floor with a lining hardwood. In addition, all lava beds and other supporting structures must also be made of such material. This is due to the fact that hardwood does not emit tar and does not heat up under the influence of high temperature, which ensures a comfortable stay in the bath.
You will also be interested in:
Tsugunov Anton ValerievichTour time: 5 minutes The modern design of the premises is often not ...
Do you want to make a bath in the house? Be prepared to meet serious requirements and ...
The easiest way to update the exterior walls of the house and give them uniqueness is ...

Trimming gooseberries is not a whim of perfectionist gardeners, but the most important procedure, from ...
If you have empty niches in your home, you can fill them with built-in wardrobes ....

