


Tsugunov Anton Valerevich
5 minutes to read
The modern design of the premises often does not welcome the use of familiar wooden cabinets, cabinets or shelves in the interior. In many cases, it is more rational to use less cumbersome decisions that fit organically into the environment. To achieve maximum functionality in combination with decorativeness, drywall shelves will help, photos of which can be seen in the catalogs of construction companies and on the Internet. With the right choice of their construction and design, you can create an interesting and unique interior and make the room convenient and comfortable.
Use of drywall shelves
Using drywall in the interior allows you to create beautiful shelves and exclusive built-in niches in the hall, in the kitchen, in the pantry and even in the bathroom.
- For zoning rooms can be installed functional.
- The plasterboard shelves in the bedroom look very original, made as a separate element or component of the main structure. In terms of functionality, such shelves are not inferior to standard wooden cabinets and chests of drawers.
- For storage of kitchen and other household utensils, open shelves and built-in niches are widely used, which can significantly save space in the kitchen and pantry.
- Shelves and racks are often used for installation in the hall of household appliances, storage of books, favorite souvenirs and other small items.
- Built-in not only harmoniously fit into the interior, but also hide pipes and communications. Due to the high humidity of the room, drywall with high moisture resistance indicators is used for these purposes.
To decorate such structures, they use both spotlights and lights around the perimeter. You can enhance the play of light with the help of mirrors and glass elements. Such an additional source of light will allow you to create a romantic atmosphere and bring mystery and grace to your interior.
The manufacture and installation of angular structures is an excellent way to use the free corners in the room for practical purposes.
The classic option is the rectangular built-in shelves of various sizes and shapes. They are embedded in special niches, which can be part of the design of the wall created at the stage of repair, or also be constructed from sheets of drywall as a decorative element. If you decide to make drywall shelves with your own hands, the proposed photos will help you choose the most suitable design, and the installation guide will help you get the job done quickly and without errors.
Stages of manufacturing drywall shelves
Before you make shelves of drywall with your own hands, you need to prepare materials for mounting the frame and the main elements, namely:
- plasterboard sheets;
- metal profile - supporting and guiding elements;
- fasteners (dowels and screws);
- serpian net;
- primer and putty;
- finishing materials (wallpaper or paint).
Design
A step-by-step instruction for making a shelf begins with creating a diagram. Before you make a shelf from drywall, determine the design, purpose and location of the shelf on the wall. After creating the sketch, the wall section where the future structure will be placed is measured.
Correctly performed calculations allow you to determine the necessary amount of materials to create a supporting structure and components, as well as the amount of work performed.
The finished drywall construction may take the form of a built-in niche or a protruding decorative surface. In the first case, the shelves are mounted on the wall in the process of assembling partitions or leveling the surface, in the second - on a flat surface of the wall.
Wireframing
The most time-consuming and complex process that requires certain skills. After designing, control marks are put on the wall surface, which will correspond to the location of the surfaces of the future structure. For a perfectly even arrangement of shelves when applying marks, it is necessary to use the building level.
After marking with dowel nails, the guides are fixed to the wall. They attach a profile in accordance with the drawing, making the frame for drywall surround. The perimeter is made of their guides, the reinforcement is made of a bearing (rack) profile.
Installation of lighting
At the stage of creating the frame, wiring is laid for future lighting, if this is provided for by the project. Wires should be hidden in the corrugation. Under cut holes in the drywall sheet.
The best solution for organizing the lighting of drywall shelves is the use of LED strip.
A finished shelf with backlight harmoniously fits into any interior.
Gypsum plasterboard casing
Before sheathing, sheets of drywall are cut into individual parts of the desired size. Further along the planned lines, the necessary elements are cut out with a hacksaw or cut with a sharp knife. All irregularities on the cutting lines are sanded with sandpaper.
Using self-tapping screws, individual drywall parts are mounted on a previously made frame. Possible misalignment of elements should be avoided in order to prevent fracture and deformation of drywall shelves in the future.
Important! In order for the structure to withstand the load, you need to use a more durable plasterboard 1.8 cm thick or mount a standard wall material (1.25 cm) in 2 layers. Additional strength will give the frequent placement of the frame jumpers.

The idea of \u200b\u200bcreating drywall shelves comes about at the same time as the idea of \u200b\u200busing this building material for wall cladding. Indeed, why not create several shelves where you could store books, keys, paintings, figurines and other “small things”. Although with the right approach, such shelves may well be used for more bulky things, such as a monitor, microwave or TV. In any case, a drywall wall with shelves will help solve the problem of storing many things or simply decorate the apartment.
When the frame is ready and securely attached to the wall, you can proceed with its casing. This is done very simply and does not cause such difficulties as in the case of the creation of the frame. To begin with, a sheet of drywall needs to be cut to size. It is necessary to calculate everything in advance so that the minimum number of sheets for sheathing is gone. Drywall shelves will be perfectly even if the cutting is done carefully so that the edges do not crumble.
So that the screws do not fall into the gypsum during fastening due to the large force on the screwdriver, you can use a special bat. This is a bit with a limiter, which will rest against a sheet of drywall just so that the screw head goes to the desired depth, flush.
For GKL staining to the profile, 3.5 mm self-tapping screws are used. In this case, the fastening step can be standard 15-20 cm. As for the length of the fastener, the moment is ambiguous. It is generally believed that the length of the self-tapping screw in this case should not exceed 25 mm. However, for those who work with GCR for the first time, it is better to take longer screws (35 mm), although they are more expensive. The fact is that self-tapping screws can bend the profile and move the sheet of drywall away from it. This often happens in inexperienced workers who have not yet got the hang of working with drywall. Because of this, the minimum length of the fastener may not be enough.
 Having cut the profile correctly, from it one can create a frame under the shelf
  Sheathe the frame from above, from below, and then from the sides
  The finished shelf can easily withstand heavy weight
 By the way, for the same beginners it is better to screw the screws one after another, and not in different places, in order to attach the sheet faster. If they are drilled sequentially, then there is less chance that the profile will be pressed through, because in the neighborhood there is already a mount that holds it.
Finish for finished shelf
How to finish a drywall shelf? For this, a variety of materials can go, but most often they use paint and wallpaper. Work with wallpapers is very difficult and long. A lot of nerves will go away, but the result may not be achieved. Although if you trim and hide everything correctly, it will turn out very beautifully. Moreover, the wallpaper will also hide the drywall cracks, if they arise. Usually wallpapers are used for painting.
 If you paint the shelves immediately, then you need a water-based paint. If you take thick paint, you can create stains with a brush on the top of the shelf, creating unique patterns. In any case, before painting drywall shelves, they need to be prepared. For this, all joints and hats of self-tapping screws are putty. At the joints of the GCR, you need to create a right angle, because there often arise problems with leveling the surface. It is putty that will help to make the shelves completely flat, and not just above and below.
To make the edges more durable, use painting corners, which are fastened with putty. You can lubricate the edges with putty, and then press the corner. He will stick. If the shelves are arched, then the paint angle will not be so easy to hold, it will have to be fixed with a stapler, and then putty. This technique will allow you to get absolutely even shelves, ready for the further finishing layer. Their edges will become strong, and will not crumble in the event of an accidental blow. After the putty has dried, it will be necessary to sand it with sandpaper. The surface comes out completely smooth.
Check out some DIY do-it-yourself shelves.

Drywall is widely used. They finish walls and ceilings, hide flaws, and build various decorative structures from it. For example, they mount shelves, beating corners, window and doorways.
Consider the features and types of shelf designs.


Features
Drywall is a very plastic material. This is a sheet with a base in the form of plastic gypsum, which is glued on two sides with building board. It differs in thickness, it is wall, ceiling, arched. For shelves try to use a material more reliable in thickness, although it is often used and arched (if you need curly shapes). When heated, GCR is able to bend.
It is easy to trim and mount, which allows you to build various design structures. This is especially true if the room does not have the usual rectangular shape.
Outstanding bearing columns, ventilation and heating pipes, walls with a step spoil the appearance, cause difficulties with the arrangement of furniture. All this can be hidden under drywall. And so that the usable area is not lost, mount niches or shelves.


Advantages of shelves from GKL:
- masking communications;
- compatibility with built-in backlight;
- lower cost in comparison with other materials for the manufacture of shelves;
- long term of operation;
- resistance to deformation;
- fire resistance;
- environmental friendliness.


Disadvantages are also available. Plasterboard shelves do not withstand severe loads. In this case, two plates are laid immediately or wooden inserts with additional reinforcement are used. Be sure to erect a frame from a metal profile or wooden battens with their fastening to the wall. Drywall does not have sound insulation.
The presence of shelves around the window openings and along the walls will not reduce the noise level. GKL constructions allow saving on furniture (racks, open shelves from other materials, cabinets and tables for TV). But there is also a drawback. To move the structure, dismantling will be required with subsequent repair work.


Kinds
All drywall shelves can be divided into two main groups: decorative and functional. The first are often open, have a lightweight frame. They have various decorative elements of the interior (vases, souvenirs, photographs).
Functional shelves are more durable, have sufficient capacity. They are designed for heavy loads, can be closed or open. Often they are erected for a specific purpose, for example, as a pedestal or niche for a TV.

Shelves can be divided according to their location. Center are located in the center of the room. Or the design is a bright accent of the interior, made of an ensemble of various shelves and niches. Products are wall, corner and built-in. The latter are most convenient. Their placement is especially appropriate in pantries, cabinets, bathroom niches.
Corner shelves are more durable than straight ones. If the wall is very curved, has outstanding structural elements, you can make a false wall from drywall. So that the useful area does not disappear, you can equip niches with shelves. They can also be decorative or functional.
Look beautiful with backlight. The configuration of the shelves can be linear or curly, obeying the general style of the interior of a particular room.


Design
Drywall allows you to erect structures of various shapes. The shelves themselves can have any shape (even asymmetric and with an inclination). Everything is limited by the space of the room and the imagination of the designer. Often, GCR is used to create built-in cabinets and walls. This allows you to erect a structure that replaces the furniture wall.
Such furniture has its advantages:
- The size and number of shelves can be determined independently, taking into account the dimensions of existing equipment.
- You can bring sockets and lights.
- No need to spend time looking for a suitable furniture wall or slide, which can be more expensive in price than the materials of construction.

On the other hand, drywall shelves cannot be moved or sold like furniture. Unlike TV stands, TV designs using shelves made of gypsum plasterboard are more functional. It is possible to mount additional wall or spotlights, LED lamps and tapes.
The backlight looks beautiful, it is functional:
- additional lighting is created;
- with the help of light it is possible to zone space
- in the absence of main lighting cozy lit islands are formed.


It is not always possible to choose a suitable corner rack. Drywall shelves perfectly solve this problem. In this case, you can adjust their size and shape. Open shelves do not reduce the space of the room, organically blending into the interior. Plasterboard shelves for books require special attention. Printed products weigh a lot, bookshelves must take into account the increased load. Since GCR is not as durable as wood, the shelves themselves should not be large. They are designed for a maximum of 10 books.
If the house’s premises are multifunctional, for example, it’s an open plan or a combination of rooms (bedroom and living room, kitchen and dining room), from drywall, you can build zoning partitions with through shelves. This will allow to delimit the space. Shelves can be used for storage or decorated with decorative vases. This option is also relevant for studio apartments.


GKL shelves can be made around window and door openings. Near the window you can organize a podium with a niche for storage. When installing, you must take into account the weight of a person, do not forget about the batteries located. If you do not put ventilated grates, the room will be poorly heated during the cold season. Shelves can be located from the opening to the wall or in the form of narrow pencil cases to the ceiling. Above the doors you can organize a mezzanine on which to place voluminous but light objects.
Shelves do not have to be wide. They can accommodate many useful little things. If there is a desk near the window, the shelves from the gypsum board will replace the rack and cabinet. With them you can organize a convenient workplace.


Communications can be hidden in a drywall box. If these are heating tubes, ventilation grilles must be mounted. On the outside you can place several small decorative shelves.
If this is a drain pipe in a sanitary room, can make an interesting pencil case. So he will look externally. Inside, it should be spacious enough: near the pipe you can hide mops and brushes, mount several narrow shelves for household chemicals.
A similar technique can be applied to the bathroom, performing a box with shelves and niches.

Scope of application
Drywall shelves can be mounted in any room. However, its humidity must be considered.
GKL does not like water and condensate, so for rooms with high humidity (bathroom or kitchen) it is better to use a moisture-resistant material.
- In the living roommost often erect central structures in the entire wall. They are convenient to organize niches for a TV, which is usually placed in the hall.
- Also, decorative structures are often erected in the nurseryto separate playing, sleeping and training areas. This is especially true if the room is shared by two children.
- In the kitchen usually place open shelves made of gypsum plasterboard. They must be strengthened, since the dishes are heavy.


- In the bathroom and toilet because of the limited space, it is quite difficult to choose racks and cabinets. It is easier to solve the issue of organizing space with the help of structures made of moisture-resistant GCR.
- In the hallway and corridors most often have closed multifunctional shelves. You can mount the mezzanine.
- In the bedroom any solutions are possible. Shelves can be exclusively decorative or functional. Much depends on the area and dimensions of the furniture.


Mounting
The construction of any structure begins with the creation of a sketch, which is a view of the shelf after installation. It is important to consider the appearance of the shelves, functionality, calculate the size and weight load. The size and type of drywall affects the development of the appearance of a future design. For example, For curved execution, a flexible arch GKL is used.
If a large load is planned on the shelves, then you will have to stack 2 sheets of material. Reinforcing elements may additionally be required. If the GLA thickness is more than 12 mm, a reinforced frame will be required.since the sheets weigh a lot.
If the shelves are purely decorative, you can take the material with a thickness of 6.5 and 9.5 mm. The standard width of drywall is 1.2 m, the length can vary up to 3-4 m.


If the shelves are planned long (more than 1 m), vertical jumpers are recommended. Longer shelves may not support the load. If they are exclusively decorative and not wide, you can do without jumpers. The front and side parts of the structure can be finished with arched plasterboard. He is cheaper. It will not affect the strength of the structure, but it will save. Interesting look concave shelves, which are erected from the arched gypsum plasterboard.
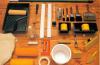
To work, you will need:
- screwdriver;
- construction knife;
- pencil;
- square, ruler;
- roulette;
- scissors for metal;
- hammer drill.

Materials:
- drywall;
- metal profile;
- suspensions for the frame;
- dowel nails;
- self-tapping screws or liquid nails.

For decoration you need:
- start and finish putties;
- putty knife;
- fine sand paper;
- corners or mounting tape for the ends.


Installation begins with the construction of a frame made of metal profile, which is mounted to the wall on the dowel-nails.
If the design is simple, you can use wooden slats. Where the load is planned, the frame is reinforced.
The next step is to lay the backlight, if it is planned. All wires are hidden in a plastic corrugated box. After drywall is fixed on self-tapping screws or liquid nails. The design is ready, you can proceed to the finish.


What to finish?
Finishing work is quite simple, you can do it yourself. The difficulty lies in finishing the end edges. The material may crack further, begin to crumble. To avoid this, the joints and ends of the sheets are trimmed with aluminum and plastic corners. Semicircular models can be trimmed with mounting tape. It’s better not to save on it, you need to fix everything carefully.
Joints can be reinforced with reinforcing mesh. It is glued with fragments on top. The self-tapping hats should not stick out, they are sealed with a starting putty. After processing the joints and ends, a finishing putty is applied to the entire structure.
It will take at least a day to dry completely. After the material must be sanded, for example, using fine sandpaper.


Drywall can be decorated with almost any decorative material. This can be wallpaper, plaster, various types of paints. The structure can be finished with the same material as the walls. Then the shelves will look like part of the wall. You can highlight them with material and color to make a bright accent in the interior, visually divide or adjust the space.
If you plan to paint the structure with colored paint, it is recommended to make the niche lighter. It will be obscured anyway. To do this, you can dilute part of the paint with white of the same brand. Alternatively, you can decorate individual shelves or structural elements. For decoration, it is worth using stone, mirrors, colored glass or plastic, imitation of stained glassand much more.
Do not use heavy decorative elements.


The choice of material for decorative finishes can be approached from the practical side. A lot depends on the frequency of cleaning. If you cover the shelves with wallpaper, they can quickly become unusable.. In this case, the external vertical surfaces can be glued with wallpaper to match the walls, and the horizontal shelves can be painted.
If the shelves are exclusively decorative, they will have to clean them infrequently with a vacuum cleaner or a special brush, they can be completely pasted over.
If you want to make shelves in the kitchen or in the bathroom, decorative materials should be chosen more practical, resistant to moisture and dirt.
For example, you can paint them with paint. The color can be selected practical.

For how to make drywall shelves in the bathroom, see the next video.
Oversized furniture is good when initially introduced into the interior of the room. What to do to create additional storage places in an already renovated apartment. Install a cupboard, cabinet or console? The price of such a solution is high.
We suggest that you take up the creation of simple and uncomplicated constructions from gypsum plasterboard and are in a hurry to tell you how to make drywall shelves with your own hands.
GKL advantages
Drywall is a unique material that can be used not only to create partitions in the room and install suspended. From it you can make a variety of niches, fitted wardrobes or shelves. They will become for you a practical and convenient place in which you can store any things, kitchen utensils, books and even household appliances.
Note! If after repair you still have leftovers and scraps of GCR, do not rush to immediately throw them away. Even if it seems to you that there is not enough room in the room, a small shelf in it will always fit.
“Do not clutter your space with extra furniture,” says one of the Feng Shui rules. But no matter how hard you try, sometimes it’s very difficult to refuse lockers and shelves.
Mounting in a room, you will solve several problems at once:
- get rid of old things;
- improve the design of the room;
- make unusual stands for a variety of collections, decorative dishes and souvenirs.
Shelf planning

For such a design, the usual profile for GCR is not suitable. In this case, the best solution is to use metal corners. Do not neglect this precaution.
If you want to use the shelf as a decorative part, its frame can not be strengthened. For him, an ordinary rack profile is enough. Once you have determined the design and structural strength, you can start preparing the necessary tool, as well as counting and purchasing supplies.
Preparation for work

So, what you need to make drywall shelves.
Materials
- Rack galvanized profiles, section 50 × 25 mm.
- Guide strips.
- Self-tapping screws, as well as dowels having a spacer.
- GKL or GVLV sheets if the shelf will be constructed in a damp room.
- Primer composition.
- Plastic mesh-serpyanka for seams.
- Sandpaper.
- Before you make a wavy shelf from drywall, you need to purchase special arched profiles.
Instruments
- Building water level.
- Roulette.
- Plumb line.
- Marker or pencil.
- Screwdriver.
- Electric Planer.
- Little Bulgarian.
- Hammer.
- Pliers or pliers.
- Hacksaw for metal.
- Paint knife.
- Putty knife.
- Brush
Installation of construction

Shelves made of gypsum plasterboard can be made at the stage of installation of the drywall partition (wall) or can be a separate structure.
Frame assembly
- Before making a partition with shelves, a common frame is created in such a way that a niche is obtained. It is sewn up with gypsum sheets, like the entire surface of the wall.
- If the shelf is hinged, a separate frame is prepared for it. Usually, a profile having a cross section of 50 × 25 mm is used for it.
- Mark the wall first with a level.
- Where fasteners were provided, drill holes with a puncher.
Things to consider before making hanging plasterboard shelves.
If the design will experience heavy loads, you will need:
- apply thick GCR (from 1.8 cm) and butterfly screws;
- fasten profiles with frequent steps;
- use frames and traverses that will strengthen the structure.
For fixed wall profiles, fix the guide rails along and across. They will create the volume of the crate.
Shelving

After the crate is ready, start lining it. The horizontal planes of the shelves, in order to strengthen them, can be made not only from gypsum board, but also from MDF, particleboard, thick plywood, shockproof glass, mirrors.
Note! If the design will have a backlight, you need to take care of the wiring in advance. Following fire safety, lay the cable in a protective corrugation.
Before you make a shelf in the corner, you will need to make cutting work.
- Take measurements of the future design. Transfer them to the GCR.
- Now you need to cut the workpiece. For this purpose, cut one side of the sheet, then break it, according to the recess.
- Bend the material at a right angle and cut the cardboard from the second side with a paint knife.
- Align the cut ends with an emery cloth.
- Fasten the sheets to the crate with screws.
How to process joints and seams

The photo shows an angular profile.
We continue to talk about what is needed in order to properly make drywall shelves. Their ends and the main surface must be absolutely even.
Therefore, it will be necessary to process the structure additionally.

- Sand the ends of the sheets.
- Apply a thin layer of gypsum putty to all joints.
- Cover them with a serpentine (plastic reinforcing mesh).
- Apply a second coat of putty.
- It should be noted that when using a sickle, it is necessary to putty the entire GCR plane.
- When the composition has dried, apply a layer on it.
To keep the corners even and aesthetically pleasing, stick the corner profiles. Such strips can be steel, galvanized, plastic or aluminum.
Note! The most durable corners are steel. However, the metal may begin to corrode over time. Rusty spots appear through the facing material.
Custom Designs

Above was described the simplest method of mounting structures made of gypsum plasterboard, which have a geometrically regular shape. And how to make a gypsum cardboard corner shelf with smooth or wavy lines?
A little instruction.
- If you use a thin arch GKL, you can make curved shelves or their parts.
- To create them you will need to make a template. To make it, use materials that are more durable than gypsum sheets.
- Perforate the prepared part on one side with a needle roller.
- Next, moisten the drywall with a brush and lay on the template. Lock the ends of the workpiece.
- Let the element dry for 24 hours. Next, remove it from the template and secure it to the frame using self-tapping screws.
- The crate can be made of special arched profiles. However, you can also bend ordinary trims, if you first make cuts on them with scissors for metal.
Total
The use of GCR in the interior of the apartment gives ample opportunities for experiments both with its design and with the layout of rooms. With the help of drywall shelves you can zone a studio apartment or delimit the space in a single room.
As the video published on this page shows, shelves made of plasterboard sheets will help make your apartment comfortable and stylish.
Photo gallery
You can give your home a more aesthetic appearance in several ways. To achieve the desired effect, some completely change the interior, others introduce new details into it, others change the decorative coating on the walls and ceiling. One of the most effective options to diversify the interior, without changing its concept, are drywall shelves on the wall, and almost anyone can make them with their own hands.
Drywall Shelf
Shelves on the wall are not only a decor element betraying diversity to the interior, but also a rather practical product. In addition to aesthetic appeal, they serve as an alternative to a traditional niche.
At the same time, they can be placed in almost any room, and everywhere they will become a design feature. However, most often, such designs are embodied in living rooms such as a living room or bedroom, where they look most harmonious.
In the first case, they are replaced and used to place books, services and even a TV. In the second, they play the role of a bedside table and are used to store personal hygiene items or a night toilet.  Drywall shelf in the interior
High practicality and good decorative properties make the shelves on the wall of drywall one of the best solutions that can significantly refresh the interior and optimize the free space. To install them, it is enough to determine a specific place on the wall and you can begin to work. The formation of shelves does not contain any secrets and is carried out according to the following plan:
- Drawing up the scheme.
- Tool and material collection.
- Markup.
- Mounting frame system.
- Finishing
This structure allows you to make the installation process more versatile and save a lot of free time. Moreover, each of these stages has its own subtleties and implies a specific sequence of actions, the result of the implementation of which are beautiful shelves.  Scheme of a drywall shelf The first stage of installation is to draw up a scheme for future construction. To create it, it is not enough to have only a visual representation, since any idea must be supported by facts. It is about specifying specific sizes and ratios, without which the plan will not carry any useful information. It can be drawn by hand on a sheet of ordinary paper indicating the full geometric proportions and position in space. Only in this form will it be useful and will become a good help for the work.
Read also
The installation process of drywall window sill
List of materials and necessary tools
Before the immediate start of construction, it is necessary to prepare the necessary, without which the implementation of the above steps is impossible. Early collection of inventory allows you to not be distracted from work and concentrate exclusively on installation. A complete list of the required tool is as follows:

Each of these tools is used at some stage of installation. Moreover, the presence of each of them is mandatory, and the absence of at least one element will slow down the work and lose time. Therefore, all inventory must be collected, the materials are folded and prepared, and their list is as follows:
- cD and UD profiles;
- (6 mm and 25 mm);
- reinforcing mesh;
- and fasteners to them;
- washers.
Having collected and prepared all the necessary elements, you can begin to form a frame system. However, you must first transfer information from paper to the wall.  Drawing of a gypsum board shelf In order to maintain proportions and obtain even angles, markings are applied to the surface. It is performed with an ordinary pencil, level and plumb. In addition, each line is checked 2-3 times and, if necessary, crossed out. The finished model of shelves will significantly simplify installation and much faster to recreate a three-dimensional object on the wall.
Step-by-step installation instructions for the frame, its lining and finishing
Having received a complete picture of the future building, you can proceed to its immediate construction. Do-it-yourself shelves from drywall are assembled according to the following system:
- According to the marking, corresponding holes are drilled on the walls and ceiling. Their length should be 10-15 mm larger than the size of the dowel, and the width should fully correspond to it. Plastic caps are inserted into the holes and pushed to the very limit so that they fully enter the wall.
- It is applied to the prepared surface, which is screwed to the wall with a screwdriver. At the same time, a washer is put on before fixing it on a self-tapping screw so that the hat does not slip through the hole.
 Fixing the profile on the wall according to the marking
 - Reliable shelves imply the creation of a whole system of profiles covering an area from floor to ceiling. are fixed along the entire height of the wall, while on the floor and ceiling they extend only at a distance of the width of the future building.
- At the four extreme points (2 near the walls and 2 near the edge of the niche), longitudinal ones are inserted, which are fixed by self-tapping screws in the upper and lower parts. To increase the carrying capacity of the rack, the longitudinal elements are connected by cross members made from the same CD profile every 40–50 cm.
 An example of a frame for a drywall shelf
 - To create a shelf between the racks, two profiles are laid. One is placed face up, and the second is laid down. The extreme parts of the cross members are placed and fixed on top of the cross members holding the uprights. Thus, the maximum rigidity of the system is achieved, and the interval between the shelves is 40-50 cm. In this case, the shelves can be placed along the entire height of the niche or the lower part can be made without them.
- that are pre-measured and. The prepared part of the GCR is applied to the crate, leveled and screwed. At the same time, fasteners (at least 4 pieces) are located in strips so that the line passes through the fixing cross member.
 Gypsum plasterboard cladding
 - Side surfaces are sheathed on three sides. At the same time, in the drywall for the inner part, recesses for the shelf frame are pre-cut. The shelves themselves are sheathed with drywall on all sides in the same way. At the end of the lining, the niche will be completely ready, it remains only to betray her the final appearance.
- The gypsum mixture is diluted to a thick sour cream and applied to all fasteners. In turn, before, they are pre-cleaned and covered and only then covered with a solution.
 Preparation of drywall seams for decor
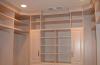
After the gypsum mixture is completely dry, it will be completely ready to apply any decorative finish. Wallpaper, ceramic tiles and any other type of material will make it truly magnificent, which will immediately affect the interior of the room. In addition, in the frame system, you can equip the backlight, which will illuminate each shelf individually.  An example of a drywall shelf with backlight As a rule, small ones are used to create it, which are mounted in the lower strip of drywall. have a much more attractive appearance and are highly practical. The video shows the assembly of a drywall shelf on a wall.
You will also be interested in:
Tsugunov Anton ValerievichTour time: 5 minutes The modern design of the premises is often not ...
Do you want to make a bath in the house? Be prepared to meet serious requirements and ...
The easiest way to update the exterior walls of the house and give them uniqueness is ...

Trimming gooseberries is not a whim of perfectionist gardeners, but the most important procedure, from ...
If you have empty niches in your home, you can fill them with built-in wardrobes ....

